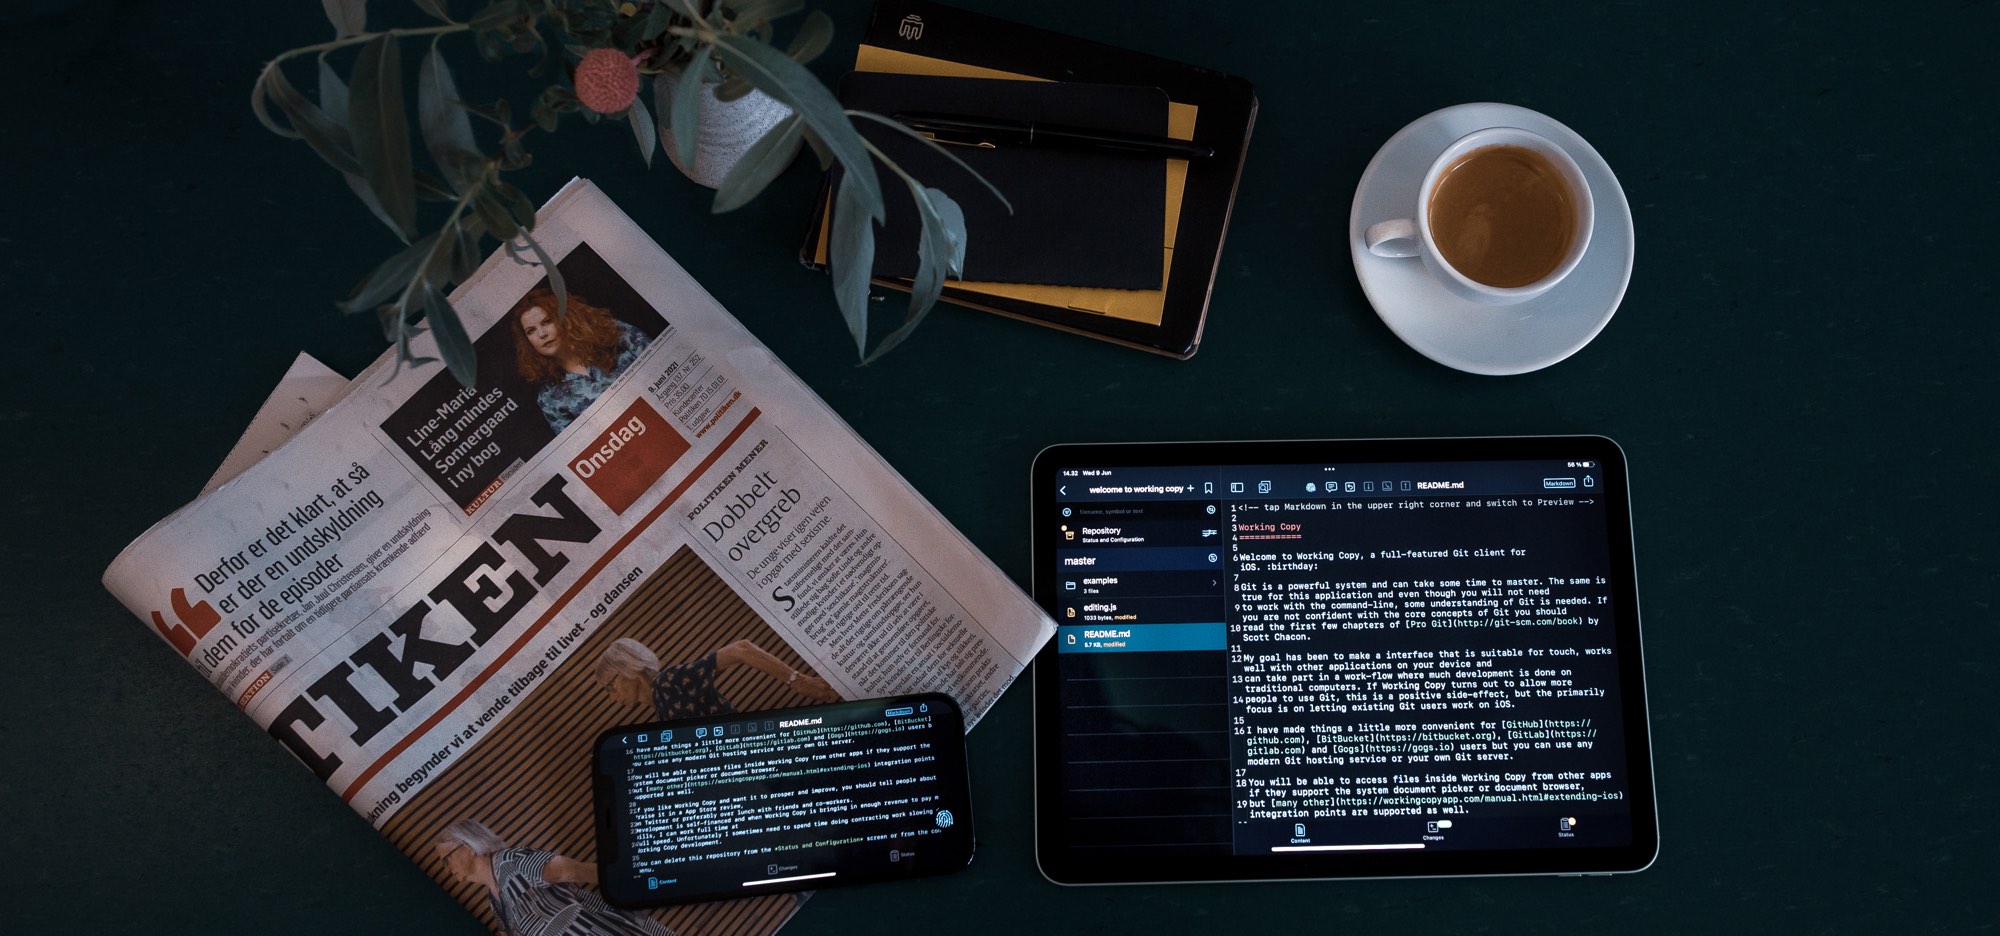


Working Copy is a full featured Git client for iOS and since Git is a powerful version-control system it can take some time to master. The same is true for Working Copy, and even though you will not need to work with the command-line, some understanding of Git is needed. If you are not confident with Git's core concepts you should read the first few chapters of Pro Git by Scott Chacon or the excellent tutorials Atlassian has made available.
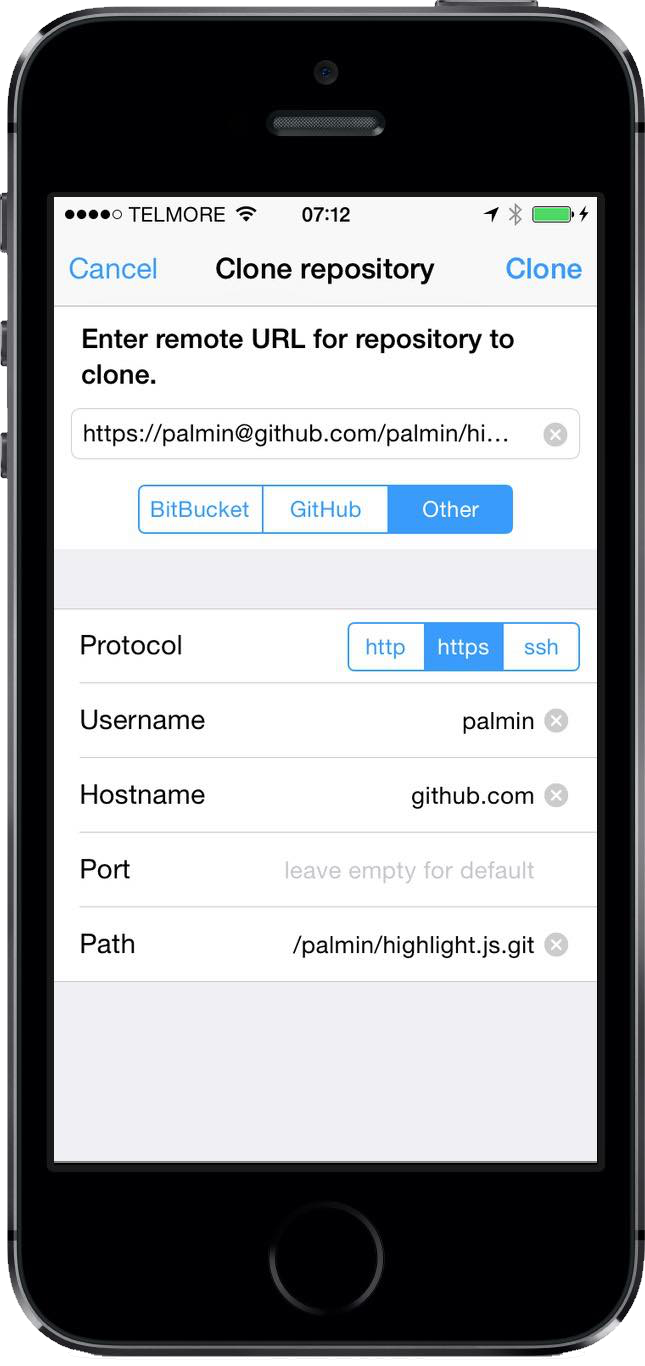
The first step is to get hold of a local copy of the Git repositories you want to access. Duplicating a repository from a remote server is known as cloning, and you do this by pressing + on the list of repositories.
You provide a URL pointing to a repository on the Git remote you wish to clone from. Working Copy can transfer data from the remote using http, https, git or ssh protocols. However, you should be careful using http transfer since data will be sent without encryption, which means your login credentials and your source code can be intercepted. If you are not on a trusted network you should avoid using http transfer.
There is special support for BitBucket, GitHub and some other hosting providers to list your available repositories such that cloning amounts to picking a repository and tapping clone. Even when Working Copy has no specific support for a hosting provider, you can copy-paste your URL into the top field and Working Copy will clone just as well.
You can also import repositories by copying directories into the Files app Working Copy location. If the directory does not contain a .git subdirectory at top-level, Working Copy assumes you want a new repository with all these files added.
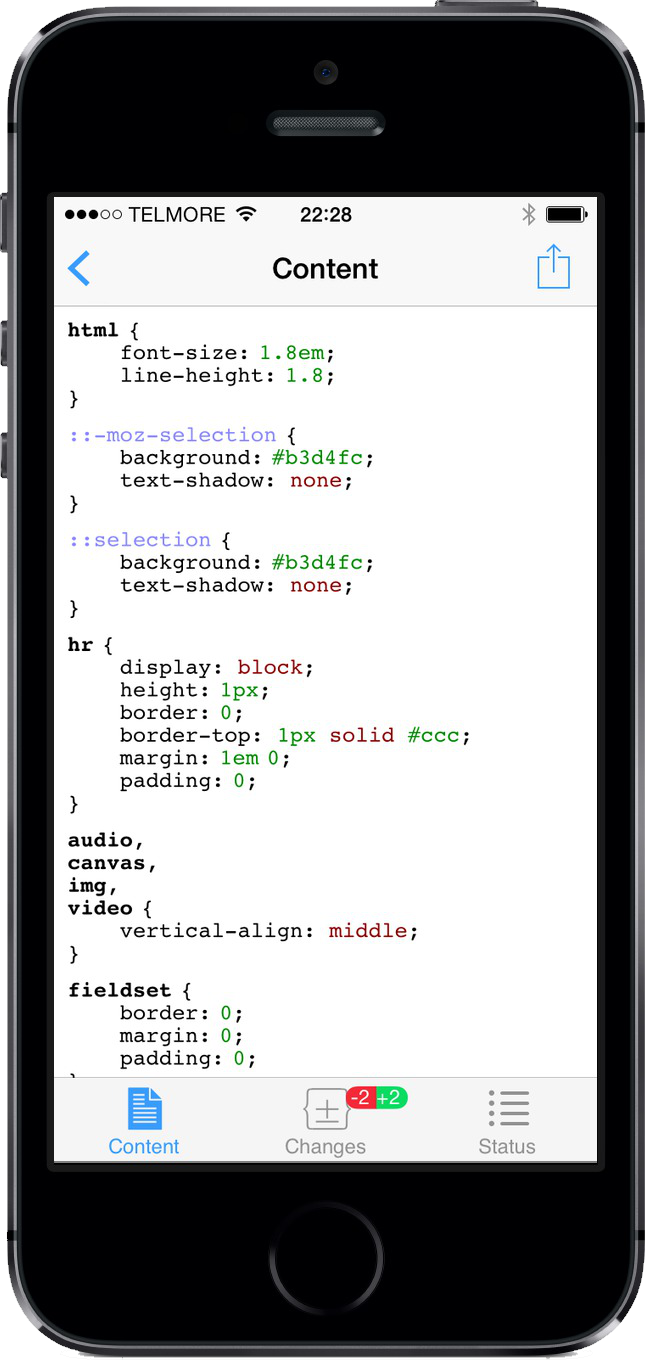
Data in Working Copy is organized as repositories, containing directories, which themselves contain either sub-directories or files. Tapping a file shows the file content, the changes to the file and the status of the file.
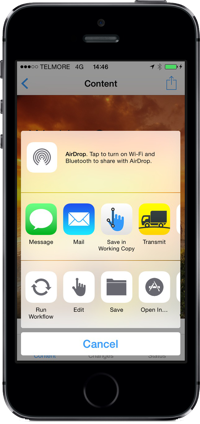
File content is shown with syntax highlighting for sourcecode and a preview of html and document files. To edit you will need to switch away from Preview mode with the button at the top showing your current mode. Tap the action-button in the upper-right corner to send the file to other applications such as Mail through a share sheet.
The editing inside Working Copy is bare-bones and neutral in that neither programming languages, markdown nor regular text files get special treatment. If you are performing heavy editing consider using a specialized text-editor app for programming, markdown or other purposes. You can read more about using Working Copy in combination with other applications.
To copy files tap and hold to show a context menu, pick Copy, then navigate to the destination directory and press + in the upper right corner to insert File from clipboard. Move files and directories by dragging them around directory listings.
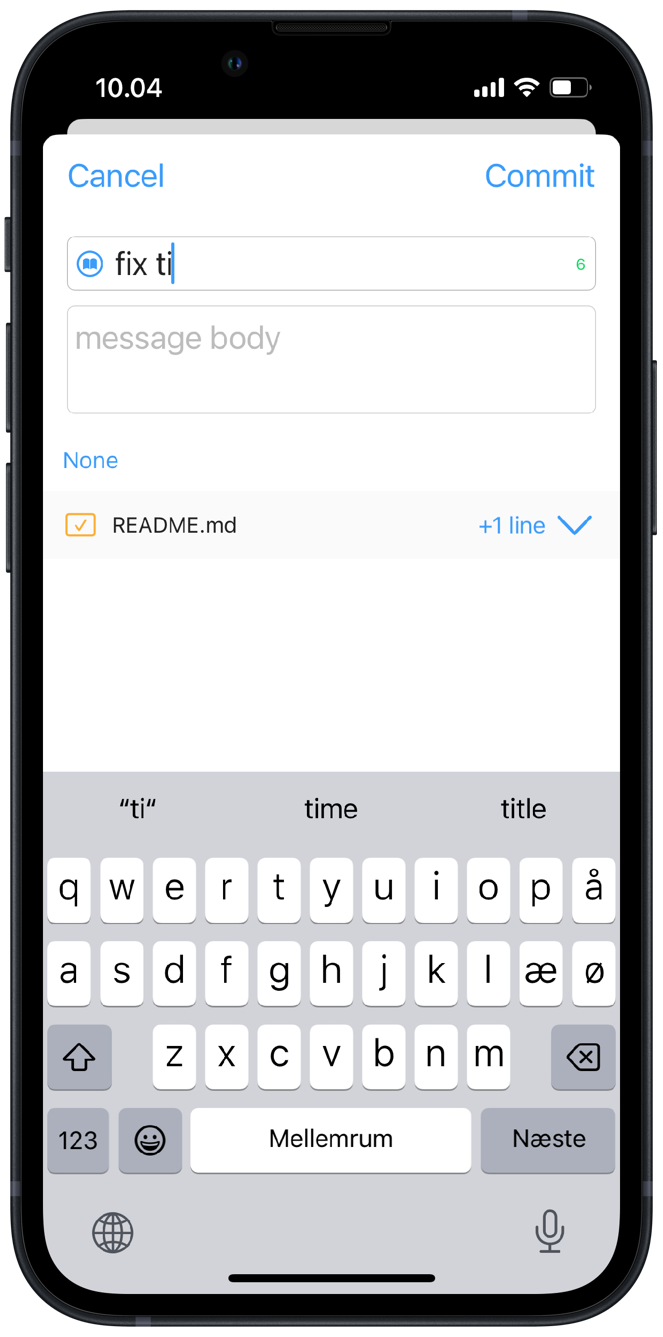
When you have file modifications the Changes tab lights up. You can see what has been added in green and what has been deleted in red. If you are satisfied with the changes you can commit them to the repository with a button on the Status tab. A faster way, however, is to swipe left on the file in the directory listing. Swiping left can generally be performed on lists of files, directories and repositories allowing convenient access to frequent actions.
You can commit a single file, multiple files or the entire repository at once, and it is considered good practice to make a commit represent one conceptual change to your repository. Following this practice also makes it easier to come up with concise yet descriptive commit messages.
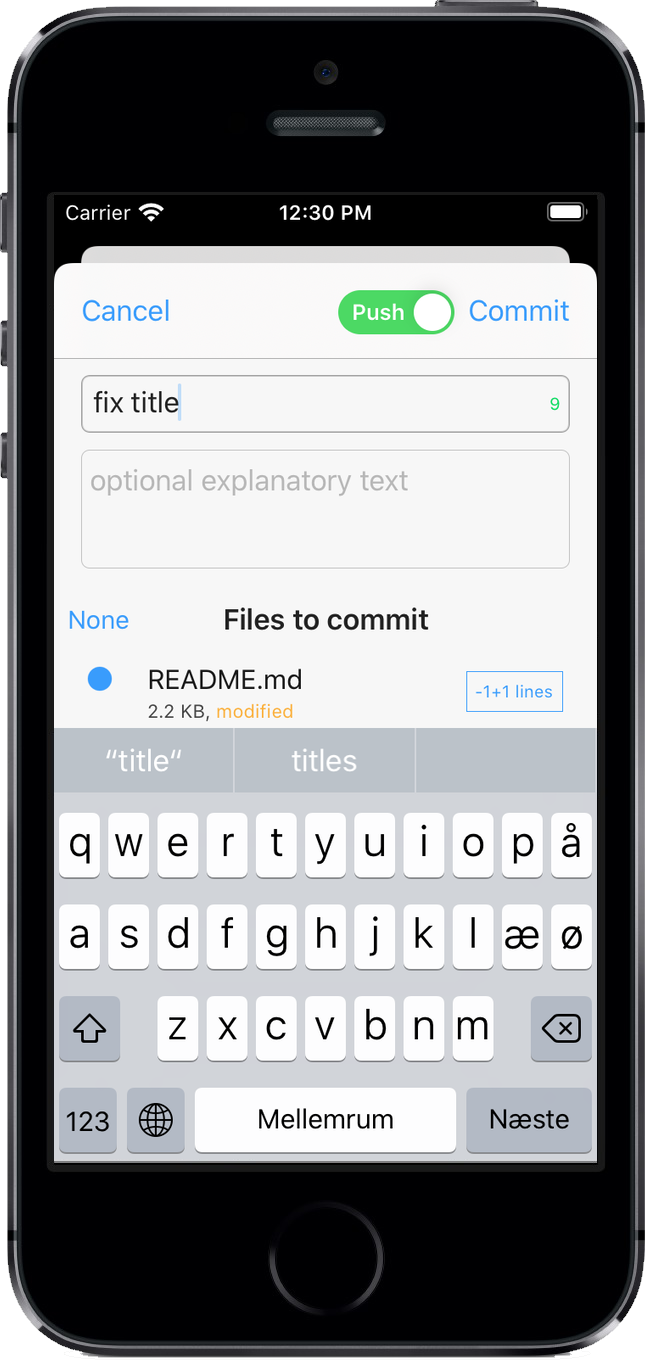
Word suggestions are shown above the keyboard when writing your commit message. Suggestions are based on the filenames and changes you are about to commit, as well as previous commit messages in the same repository. This is combined with frequently used sentences in commit messages in public repositories. No information from your commits or repository is collected to make this happen.
The small button at the left of the commit message field shows a list of previous messages and includes the ability to suggest messages using artifical intelligence. These AI suggestions require sending staged differences to OpenAI and should not be used on sensitive repositories. AI suggestions are available to users that purchased or upgraded their pro unlock after March 2022.
The list of files include everything that can be committed. You tap files to stage or unstage for commit and the rightmost button shows the difference for this particular file between working directory and last commit. When looking at differences you can stage/unstage individual hunks by long-tapping and swiping making it possible to commit some changes in a file but leave others uncommitted.
When you have made one or more commits your on-device repository is seen as being ahead of the remote repository and you push these commits to the remote. Because Commit and Push are distinct actions you can Commit while offline and Push once you get back online.
To Push after Commit tap and hold a repository and Push from the context menu. You need to unlock the ability to Push with an in-app purchase.
Commits can be pushed to the remote from many sources. Other people contribute their work, or you could be doing something on a regular computer or another iOS device which results in commits that end up on the remote.
You get commits back into Working Copy through a two-step process where you Fetch and Merge. Fetch reads commits from the server and requires a network connection. The commits will not be integrated with the local data on your device until you Merge, which will combine the new commits from the server with your local data.
You can pull the list of repositories down to Fetch for all your repositories. If any of your repositories received new commits you will be able to Merge all these repositories with a single tap.
Sometimes data cannot be automatically combined because your local changes conflict with the changes from the commits fetched. These conflicts can be resolved by manually editing files and picking the wanted parts from the conflict markers and tapping the Resolve button. A faster solution is to use the Resolve tool that lets you resolve conflicts for many files at once.
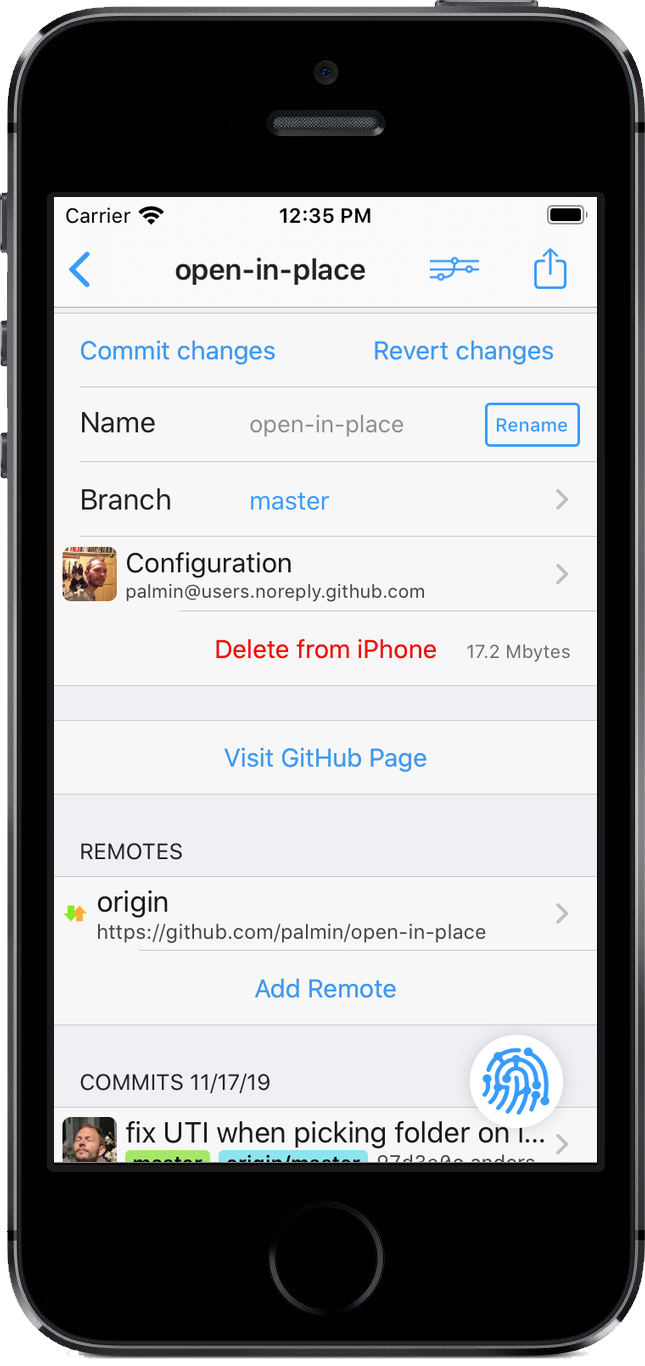
Performing a Fetch followed by a Merge is called Pull. On the remote detail screen you can Fetch, then Merge and finally Push with the Sync button.
You can configure repositories to Rebase instead of Merge commits from the Configuration page inside Repository status. This is a pro configuration available to users that purchased or upgraded their pro unlock on October 17, 2018 or later.

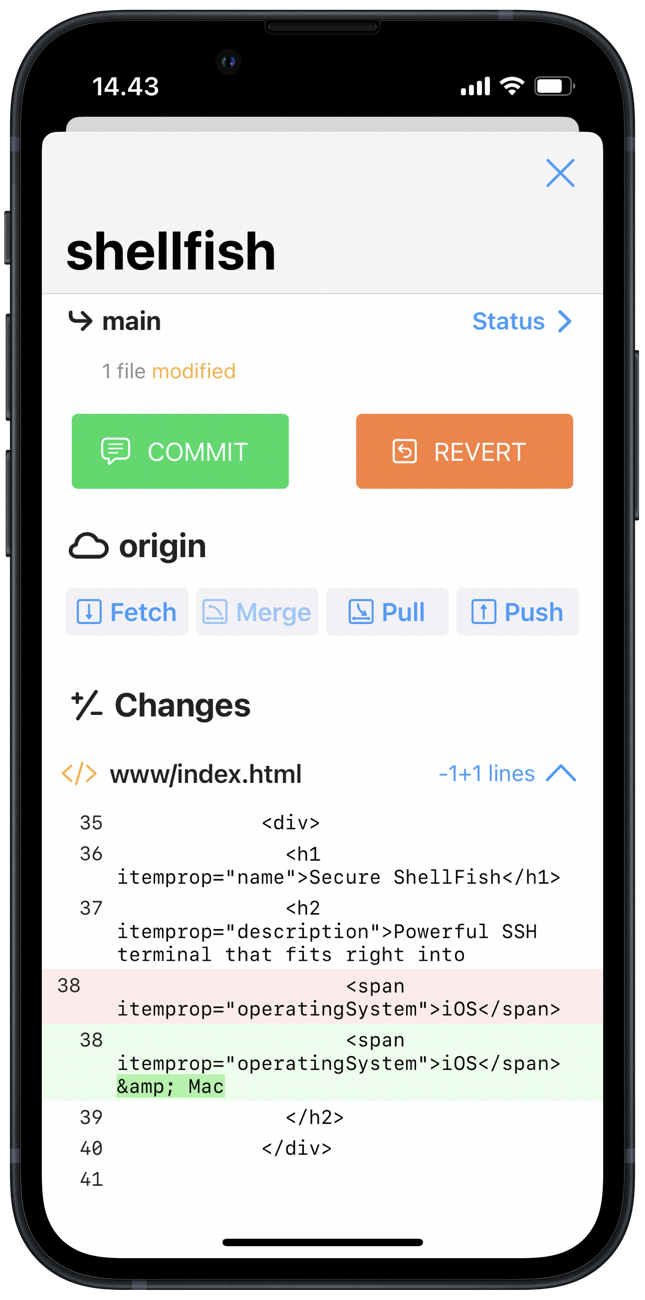
To make it easier to perform important actions a floating fingerprint button is available in the lower right corner on iPhone. This button opens a repository status sheet with easy access to Commit, Revert, Fetch, Pull & Push and lists modified files.
On iPads with sufficient screen space these repository actions are available at the top of the screen without the need to open any sheet. It gets easier to remember what each button does when you realise the icons are used on the status sheet and in context menus as well.
On iPad the fingerprint button can be dragged into a new window to show the repository status sheet and since this displays modified files and updates as files change, it can be very useful while using external editors such as Textastic.
You can tap and hold this floating button to change the location on screen.
Once you are done with a repository you can delete it from the repository context menu or status screen. This has no influence on remote repositories.
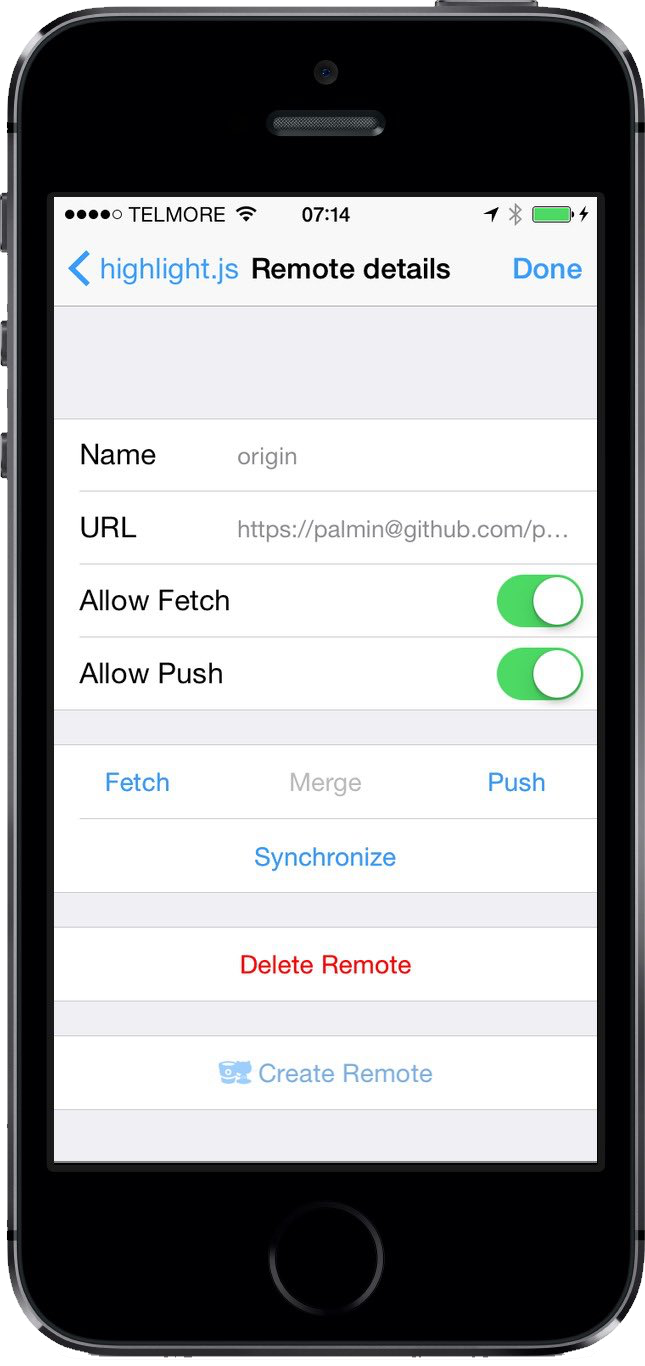
Git remotes are server-side duplicates of your repositories with full history. These can be services such as GitHub, BitBucket etc. or they can be be privately hosted servers.
When you clone a repository, the URL of the remote repository is your starting point. Working Copy supports ssh, https and http remotes and the URL consists of protocol scheme, the hostname, username and the path to the repository on the host. The following are typical examples of remote URLs:
https://user@git.company.se/home/user/site.git
ssh://andrew@company.se/home/andrew/git/site.git/
andrew@company.se/home/andrew/git/site.git/
The last two URLs are equivalent since ssh is the default protocol.
Authentication will always try with a username included on the form username@ otherwise remembering the last username for that host. The username git has special meaning for many hosts such that the actual user account is derived from the SSH key used to authenticate.
If you enter the Repository page you can add or delete remotes. After cloning there is only a single “origin” remote and, in many scenarios, there is no need for additional remotes.
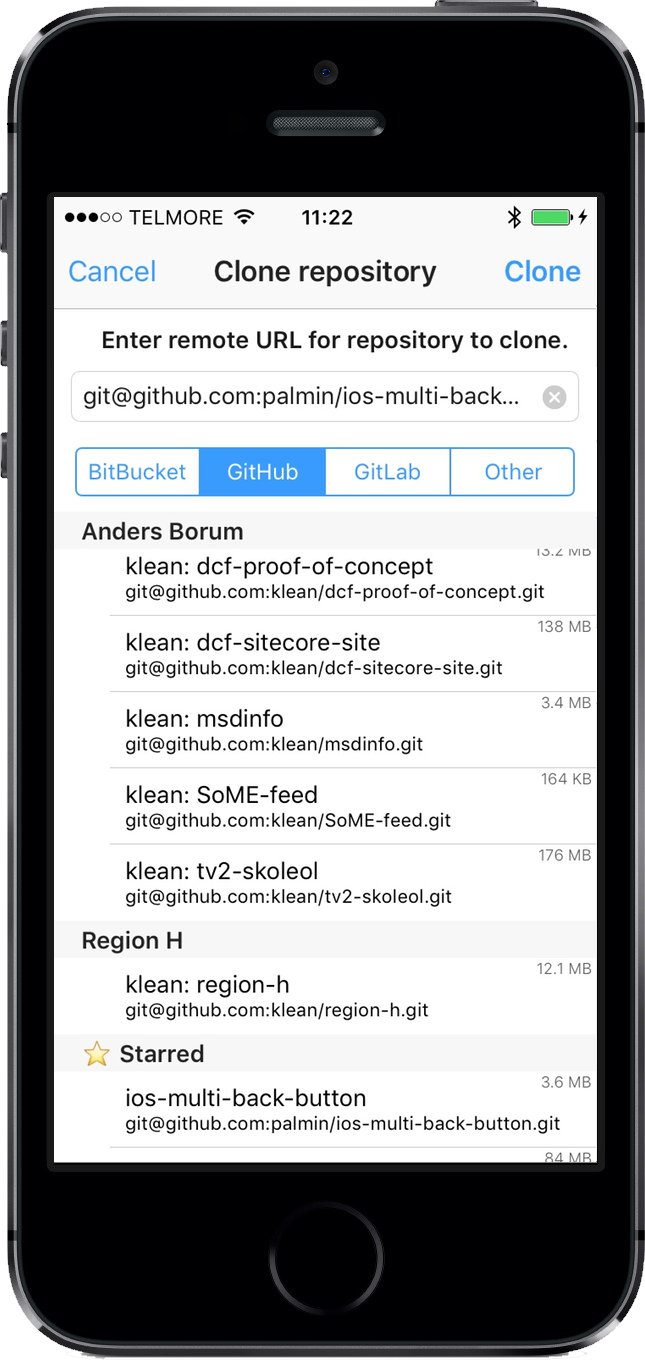
When cloning repositories from BitBucket and GitHub you can enter your credentials to get a list of repositories to clone. Working Copy tries to show the most relevant repositories at the top, these being the ones where you have administrative or push privileges. Your GitHub Gists and BitBucket Snippets are also available from this list.
If the list is long, enter keywords in the search field in order to only see repositories containing these. If you do not see the repository you wish to clone, you can still copy-paste the clone URL into the top-field manually.
Organizations on GitHub can be configured to restrict third-party applications such that repositories are not listed and you might need to ask your administrator to approve Working Copy. Use manually configured SSH keys as a work-around while waiting for approval.
You configure additional hosting providers from Working Copy settings or you can clone using a URL from the clipboard.
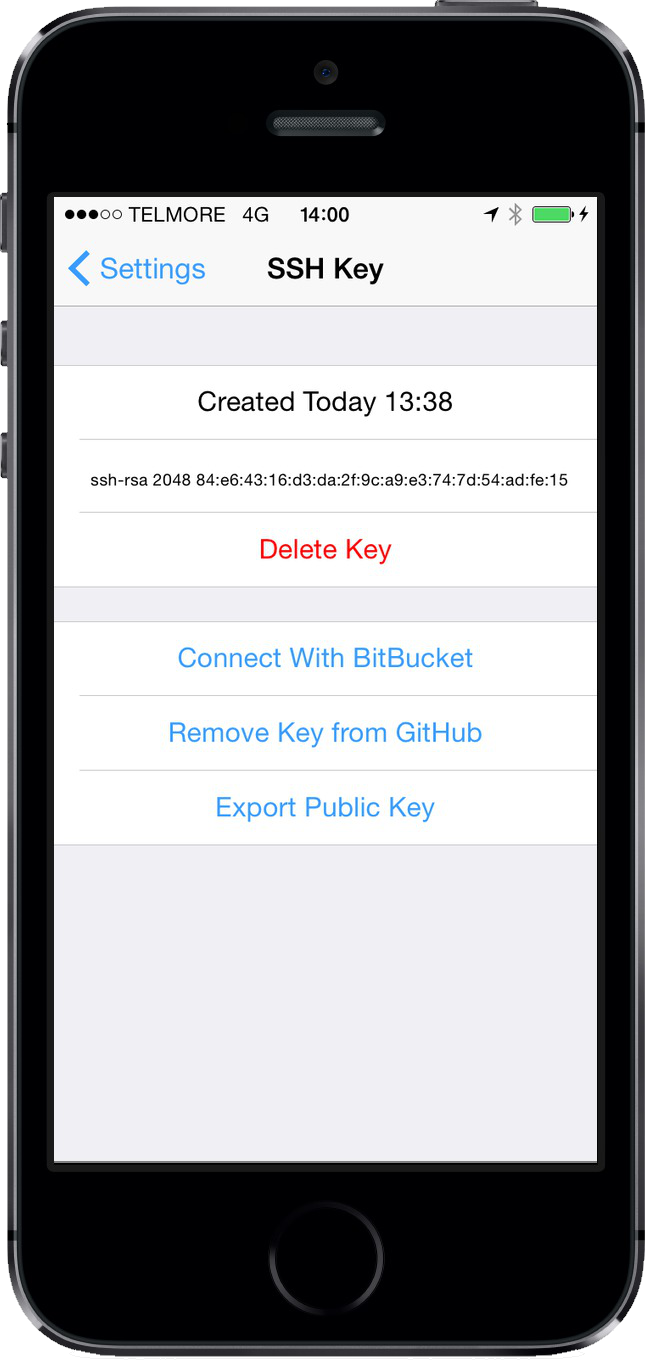
SSH transfers support password authentication but also public/private key authentication for improved security. The public part of a SSH key corresponds to a padlock that you use to lock-down resources. The private part of the SSH key corresponds to the physical key that opens the padlock. Your private key must be kept secret and the public key can be distributed to servers where you want to store remote repositories.
If you tap “Connect with BitBucket” or “Connect with GitHub” your public key will automatically be registered with BitBucket or GitHub. For other Git hosting providers such as OpenShift or AWS CodeCommit you need to enter your public key in the settings page for that service. The details will depend upon the service in question, but your first step is to Export the public key. When using a Linux server, you need to append the public key to the $HOME/.ssh/authorized_keys file.
Working Copy generates 4096 bit RSA keys and imports RSA, ECDSA or Ed25519 private keys in PEM or OpenSSH format.
If you are having problems authenticating with an SSH server check that the public key installed on the server matches the private key in Working Copy. If you have some other SSH client on your device or computer, you should make sure you can connect from these without problems. If this works, you must also make sure you use the same SSH key in Working Copy, possibly importing the private key from the other application.
When exporting the public key you end up with something on the form:
ssh-rsa AAAAB3NzaC1…g+y4Pfz9 WorkingCopy@iPadPro-31092017
Everything after the second space is just a comment, that makes it easier to determine where and how the key was created. It can sometimes help to remove this comment, before registering the key with your Git server.
SSH keys registered on your GitHub account by Working Copy will not grant access to repositories owned by organisations restricting 3rd party apps. They are unrestricted when manually added to GitHub.com settings.
It is possible to deploy to Heroku using Git. You need to setup a second remote for your repository that points to your Heroku application. Since the Heroku CLI is not available on iOS, you must manually configure the remote.
The easiest way to do this is to setup your remote on a regular computer and determine the remote details on the command line by entering:
git remote -v
You then create a new remote from this URL in Working Copy. Note that username and password for remote is not your Heroku account credentials. You will find this information in your home directory in the hidden file .netrc
cat ~/.netrc
When you push to your Heroku remote the deployment status is logged and shown inside Working Copy.
To use Working Copy with AWS CodeCommit you need to create an IAM user with the IAMUserSSHKeys Policy. You also need to add some Policy allowing repository access and AWSCodeCommitPowerUser is a good choice, unless you only need to clone and fetch code in which case AWSCodeCommitReadOnly is preferable.
You must also export your SSH Key from Working Copy and Upload SSH Public Key. This is done in the Security Credentials tab of your IAM User. When your SSH Key has been uploaded it will be listed with a SSH Key Id that will be needed for the next step.
Your repositories are listed in the CodeCommit Dashboard. When looking at individual repositories you can request the Clone URL in the SSH format, which can be used inside Working Copy, but you need to use the SSH Key Id as your username. Your URL should end up looking something like:
ssh://APKAJMDDPOLPSL7OAYOA@git-codecommit.us-east-1.amazonaws.com/v1/repos/test
Glitch is a online service and community for creating web apps. You can edit from a web browser but they also provide access through a Git remote.
If you use Process in Working Copy from the share sheet in Safari the equivalent Git repository is opened in Working Copy cloning it as needed. If you are editing on glitch.com when using Process in Working Copy the remote url includes a username token that grants you push permissions on the remote.
When pushing changes back to glitch you need to push to another branch than master and use their console to merge in and reload changes. You can read about this here.
Git remotes at api.glitch.com behave slightly differently than other Git remotes and you need to include the username and a empty password to the remote url for pushing to work.
To make it easier to list your repositories, to create new remote repositories and to configure your SSH keys you can configure hosting providers.
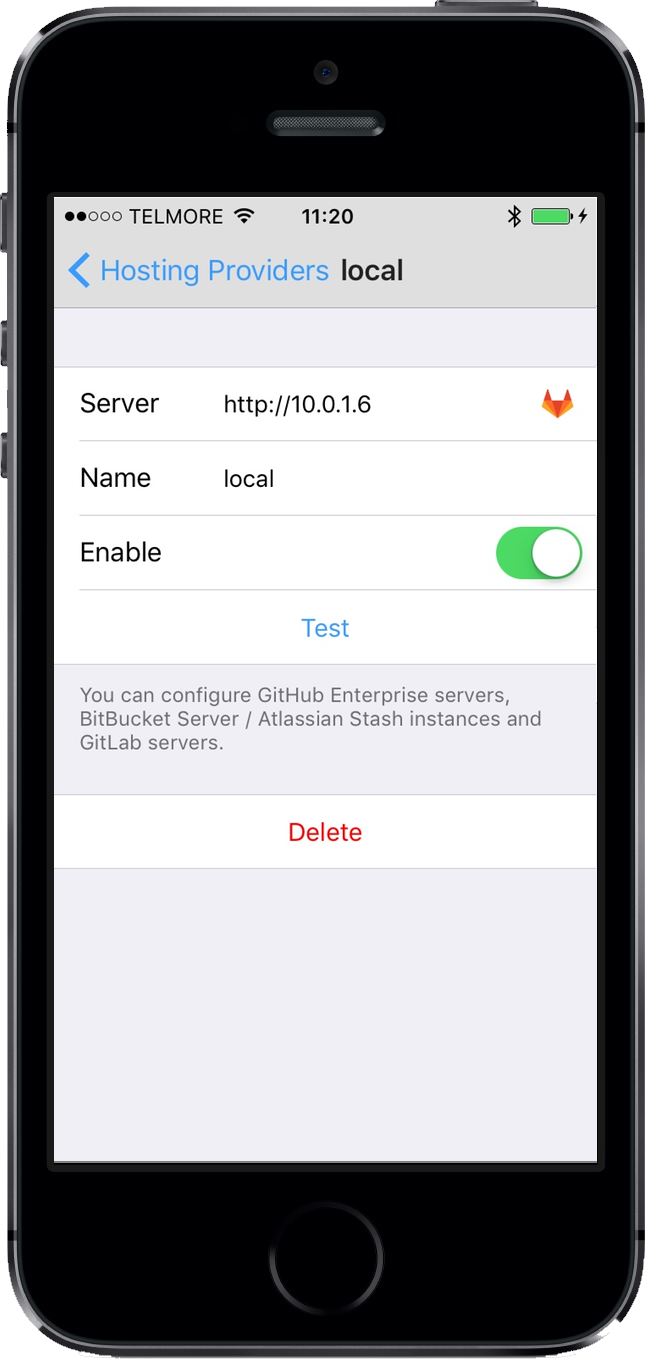
Working Copy supports private instances of BitBucket Server (previously known as Stash), GitHub Enterprise, GitLab and Gitea.
You enter the hostname of your server and the instance type is identified automatically trying a combination of schemes and ports. If your hosting provider isn't recognised or auto-detection is taking too long it can help to enter a full URL including scheme and port.
You can configure cloud instances of the above hosting providers or configure a regular Linux server, BSD server & Synology NAS to act as a hosting provider, using SSH commands for listing repositories.
If you have several user accounts for a hosting provider you can bake the user into the server field as https://username@github.com to get a hosting provider for each user.
When you add hosting providers it is often a good idea to disable the built-in providers you are not using to avoid clutter in other parts of Working Copy. This is especially important when you configure providers with a baked-in username as the default providers for the same service will switch between user accounts.
If you hosting provider does not allow authenticating with a regular password access tokens can often be used instead.
For GitHub Enterprise you visit the website and go to Settings > Developer Settings > Personal access tokens and tap Generate new token. This token should be granted repo, read:org, admin:public_key, gist and admin:gpg_key to support all Working Copy features but repo is the most important one.
GitHub Enterprise Server instances are configured as new hosting providers where GitHub Enterprise Cloud is part of the built-in GitHub hosting provider such that you need to disable OAuth Authentication to allow access tokens authentication.
On GitLab you go to User Settings > Access Tokens to create new tokens where the api scope is required.
You normally use the access token instead of a password and it will be remembered until you sign out of the service. The exception is Gitea where the access token replaces the username and the password is kept blank.
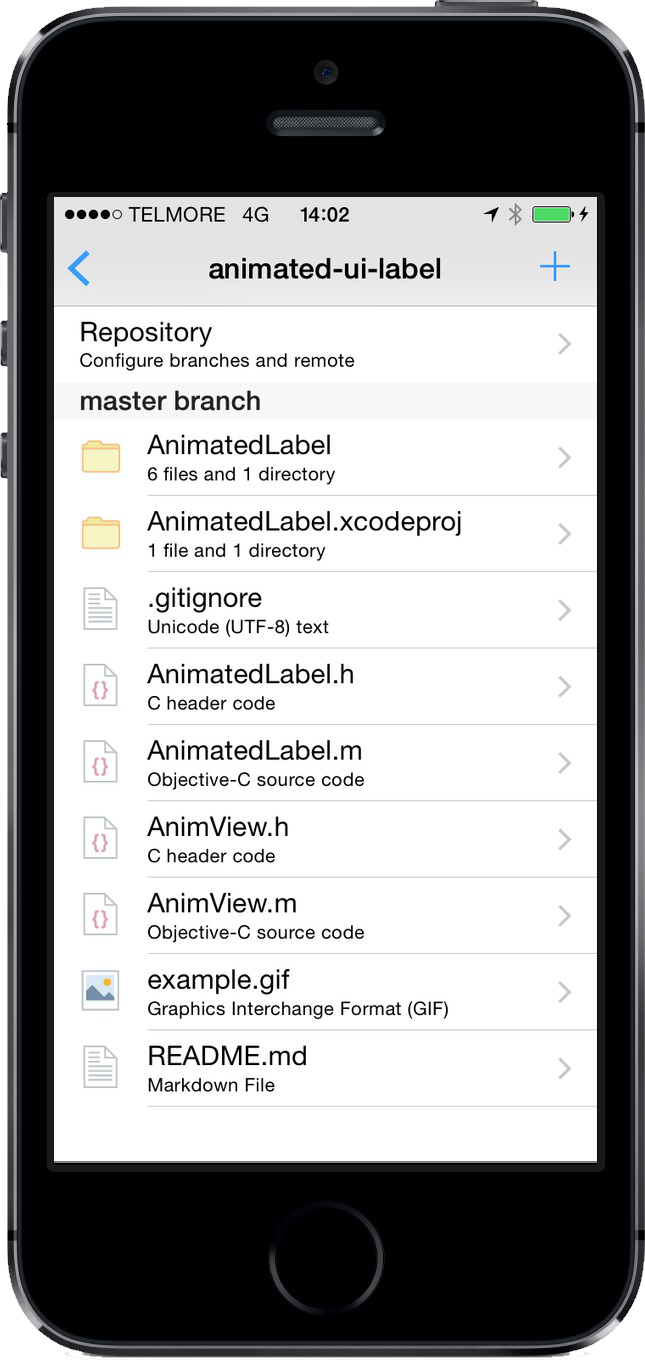
A repository is presented as a hierarchy of directories and files where you tap a directory to enter and view the contents.
You can swipe right on entries or press and hold to access commonly used actions such as Commit, Revert and invoke the share sheet which allows exporting single files, directories or the entire repository.
Open recently accessed documents from the bookmark button in the upper right corner above repository or file listings.
If you tap a file and pick the Content tab you can view the file in different modes. This is controlled by the button in the top bar indicating the current mode. The top choices are the recommended mode for this file and depends on both filename and file content. When you pick a mode for a given file, Working Copy remembers this choice for other files with the same file extension.
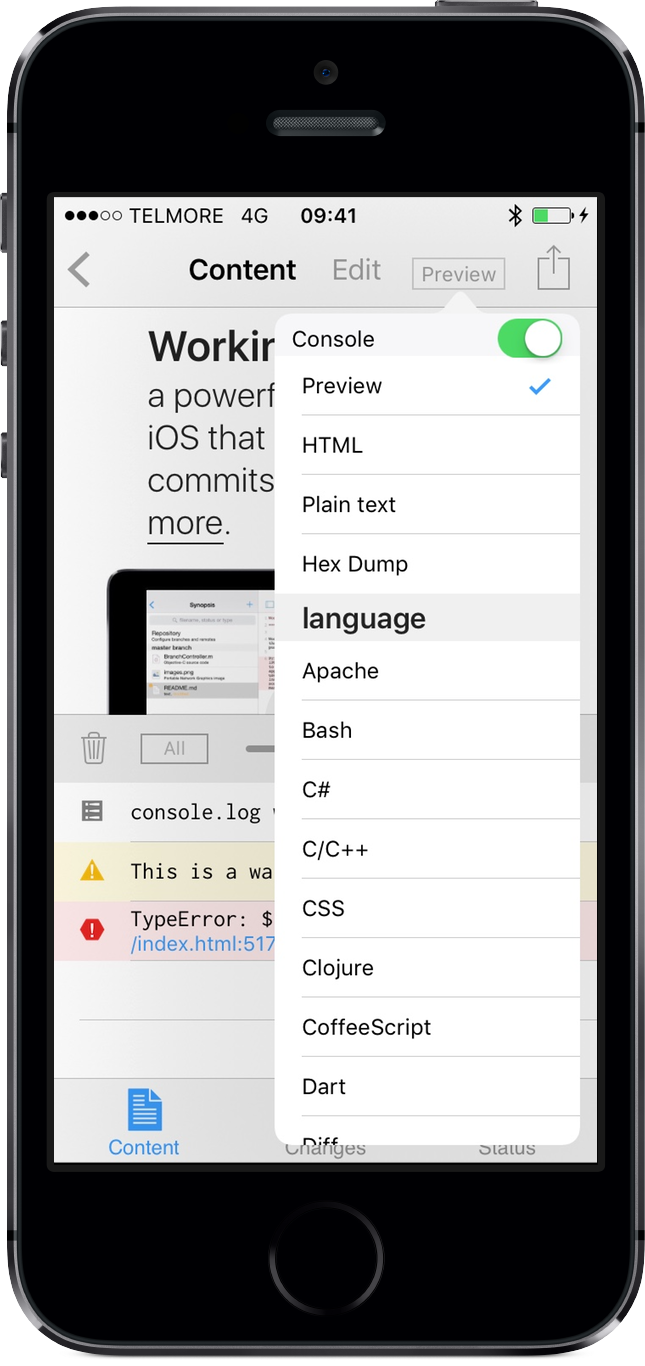
Text files can be viewed as plain text or with syntax highlighting for one of the supported languages. Font size is adjusted in the popup switching between modes and is remembered individually for different modes.
You can pick between a number of included fonts or import new OpenType or TrueType fonts as a pro feature.
Looking at source code you can tap anywhere to start editing. Done in the upper right corner stops editing. You undo latest changes with the undo-button above the keyboard on iPad or by shaking your iPhone. If you want to undo all your changes, switch to the Status tab where you can revert the file to how it was at last commit.
Any text selection can be transformed with action extensions, which will let you do things such as URL encode text from within the editor. Shortcuts is the prime example of such a application.
When your selection matches a valid CSS color you can adjust this. Placing the caret where a color is expected the popup menu also lets you use a color picker.
Use .editorconfig files to control encoding, newline style and indentation in a manner supported by a wide range of editors and IDEs.
You enable Preview mode with the button in the upper right corner which is available for HTML, Javascript, Markdown, org-mode, AsciiDoc and Jupyter notebook files.
When previewing HTML files, relative links to images, javascript and stylesheets resolve to files inside repository and will work without Internet connection. External assets require a Internet connection to load. If offline preview is important to you, consider including javascript frameworks inside repository.
You can make edits from other apps while previewing using the iOS document picker or WebDAV access. When there are changes to the file being previewed or any local assets it depends on, the preview will automatically reload. To make it easy to evaluate changes, the scroll and zoom settings are restored during reload.
Enable the Javascript Console to check for errors, warnings or log statements. Errors that occur in javascript files inside repository can be tapped taking you to the line in the source file. You can evaluate javascript in the context of the HTML page and when external keyboard is attached, the ↑↓ keys let you step through evaluation history.
You can preview from other devices or computers, by enabling External URL. Long tap the URL to put it on the clipboard or use Handoff to connect. This preview will keep working as you switch back to editing mode.
Putting your iPad in split screen mode you can have Safari side-by-side with Working Copy to preview and edit simultaneously.
External preview is a pro feature available to users that purchased the unlock or upgraded their pro unlock on January 8, 2018 or later.
You can search repository files by name, text content or symbol declarations, which is often the fastest way to navigate a large repository.
When you search from the top of directory listings, results are included from this location in the file hierarchy including files inside sub-directories. Search from the Content tab of a file includes results from the entire repository or the current file depending on the scope selection.
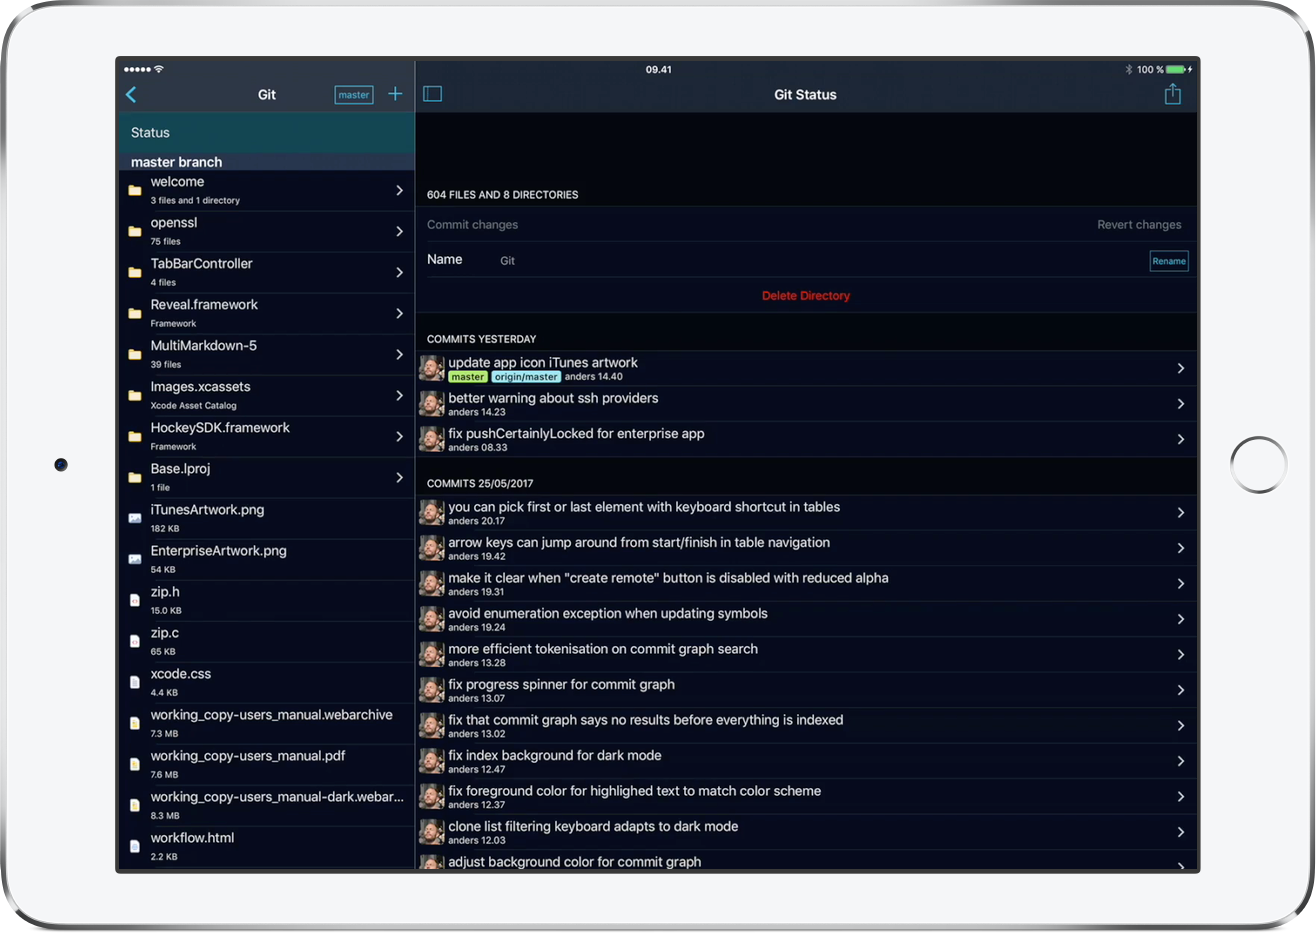
Search queries will be matched against filenames, symbols, line numbers and text content. For filenames and symbols a fuzzy matching will be performed which means that the characters in query must occur in the given order but characters can be skipped. The query read.md will fuzzy match both readme.md and readme.markdown but the first one will be ranked higher as it's closer to a non-fuzzy match.
When you type several search words they all have to match either a filename, symbol, line number or text. The query read.md 10 will be understood as
All files in your repository need to be read and parsed to satisfy searching for text content and symbols. When you search for the first time in a large repository, indexing can take several minutes and the progress is shown in the right part of the search field. Filename searches will be available almost immediately while text content and symbol results will update as the repository is indexed. Only files that have changed since the last search will be indexed when you search a repository that has been indexed previously, requiring much less work.
While searching a small button is shown to the left of the search field with quick access to recent queries and settings to toggle whether results include symbols and file content or only filenames.
Editor search uses your current selection or the word at your cursor as the start of your search. This is convenient to lookup a symbol declaration or the usages of a function or class. Invoking search when looking at the Content tab of a non-text file the query will be your current filename, showing usages of that particular file.
The prefilled query is selected such that it can be deleted with a single tap and when the query is empty you are shown recent edit points for repository scope and symbol declarations for the file scope, which is useful for quick back and forth navigation. Regular expression search is supported for the file scope by wrapping your pattern in slashes such as /[0-9]+/ to find all integers.
Typing on a external keyboard it can be efficient to not more your hands from the keyboard to the screen. The arrow keys let you cycle through search history, but this makes it impossible to navigate search results with these keys. The trick is to refine your query until the result you want is the top one, and ⌘⏎ lets you pick the top result.
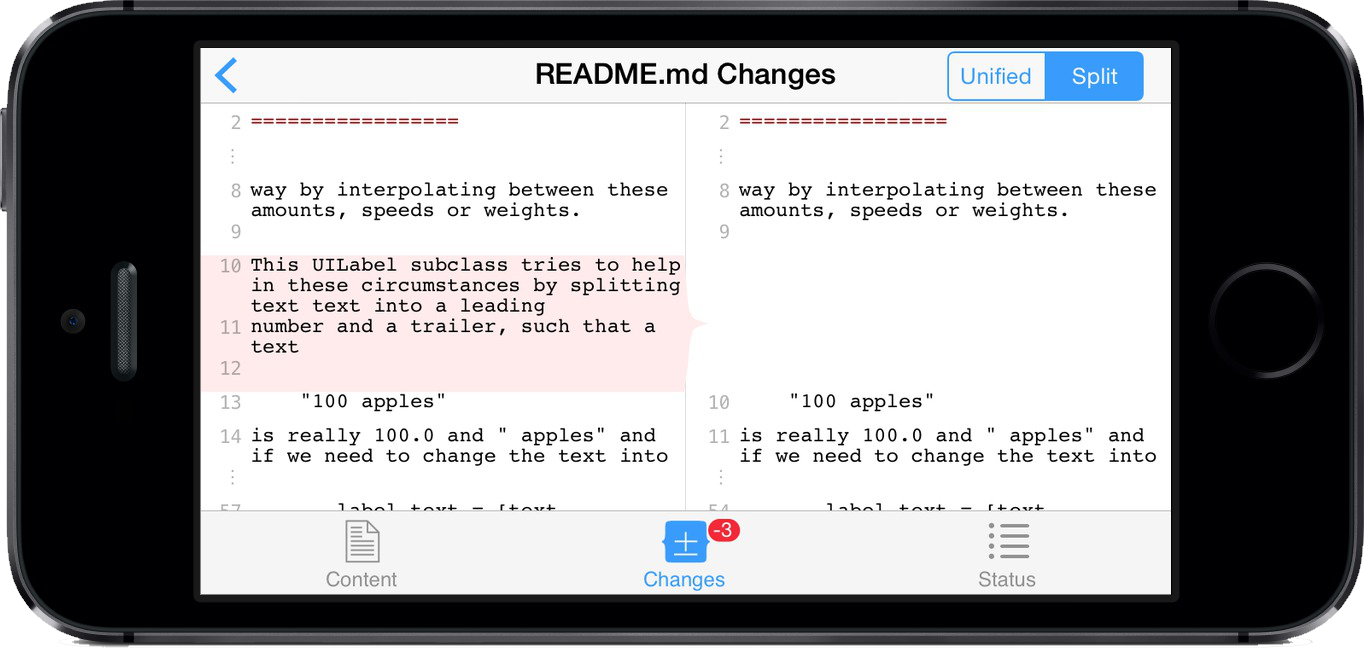
A badge on the Changes tab shows the number of lines added or deleted from a file. The Changes tab itself shows the differences between the last version committed and the current version. The two-panel split-view in the screenshot requires the screen to be wide and for phones to be turned to landscape mode.
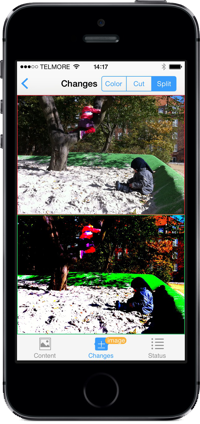
Image changes can be viewed in a split-mode where zooming one image will make the other one follow - making it easy to focus on the details. If you are unsure as to where the changes are in an image, use the Color mode that highlights changed areas in green where identical areas are without color. Cut mode is useful for images with global changes and allows you to drag and rotate a partitioning line in such a way that everything on one side is the old image. The previous image will have a red border, and the new one a green border.
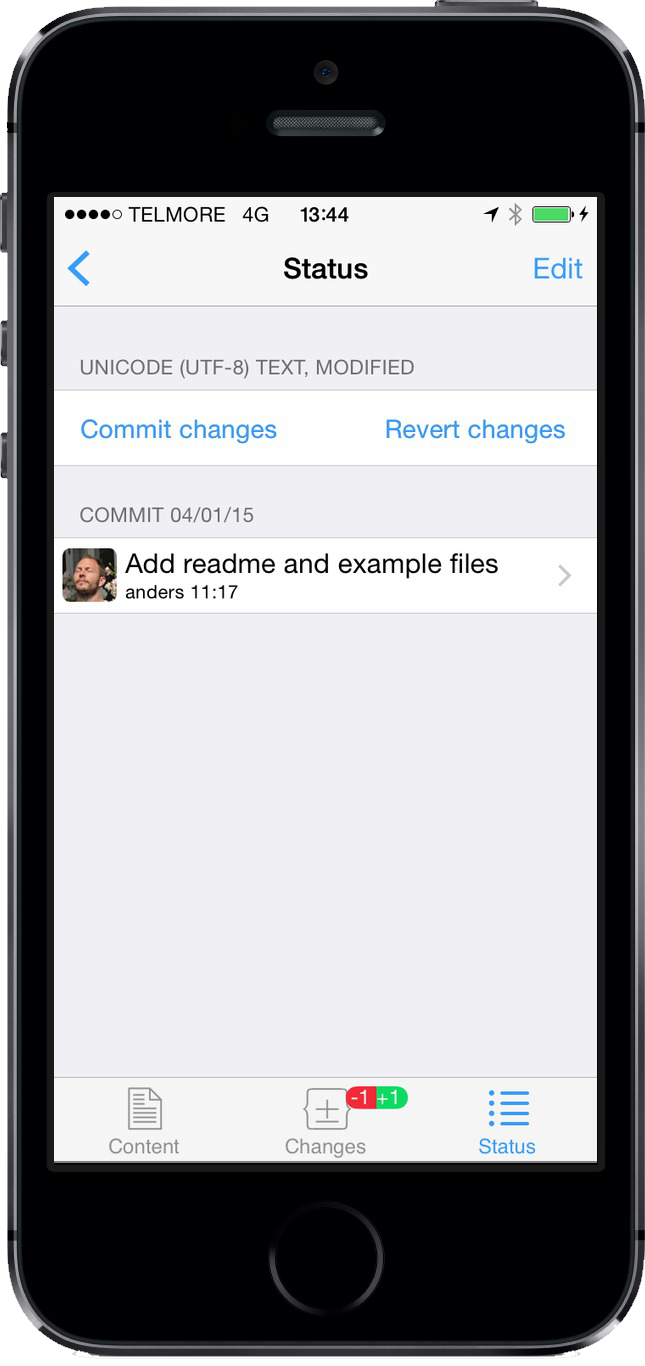
The Status tab says whether the file is modified and allows you to commit or revert changes.
You can commit changes to your files for the entire repository, for all files in a sub-directory or for a specific file. If you do not wish to commit some of your files you can Revert to how they where at the last commit. The files taken into account are determined by where in the directory structure you initiate the commit. As a short-hand you can swipe left on a repository, directory or file to commit.
During commit you are shown a list of changed files and can view differences for individual files by pressing the button that shows the number of lines added or deleted. Files with a checkmark will be included in the commit and you toggle the checkmark by tapping the file. Working Copy will push the commit to the remote right away if you enable the Push button.
As a general rule you should make commits with a single purpose and only include the changed files that helped achieve this purpose. You should write a message in the top line describing this purpose; if it is hard to write something short but concrete you might need to break your commit into smaller parts.
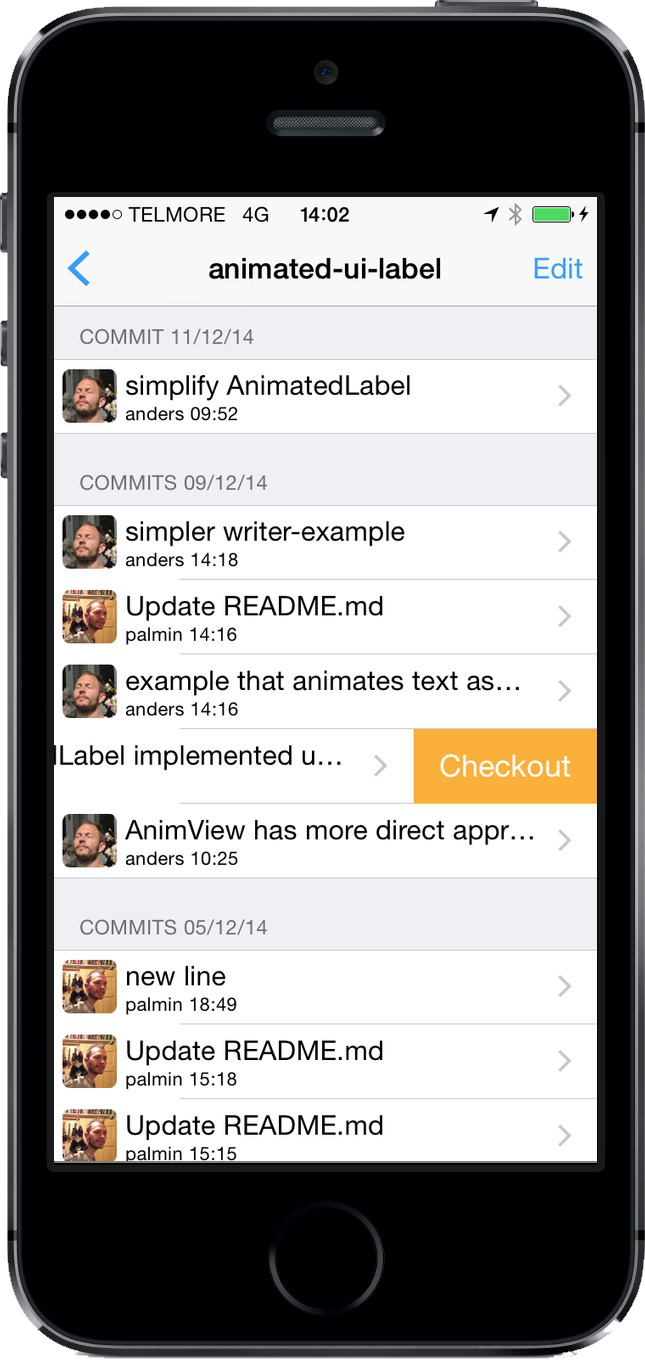
The value of well-drafted commit messages becomes apparent when looking at a log of previous commits. You may do this for either the entire repository, a directory with all its files or for single files. If your commit messages are meaningful, even if you return to a project after months or years you have a much better chance of making sense of the source-code. Tap a commit to see specific changes this commit made to the files in question.
The images shown in commit-logs are determined from the email-address of the person making the commit with the help of gravatar.com. At the commit-list for the entire repository you can Checkout old versions of your files by swiping left on a commit. Your repository will be in a “detached head” state where you cannot commit any changes, but if you make modifications and wish to keep these, you should create a new branch.
Checking out the topmost commit will reattach the head in such a way that your repository is back to normal.
When not yet pushed to a remote, you can Undo your latest commit by swiping left in the commit-list. All changes for that commit are kept in your working directory as modified files. If you commit again the last commit message is remembered, making it very easy to commit again to fix typos in the commit message or only commit some of the files, splitting a large commit into smaller ones. When the last commit has been undone, you can Undo another, letting you squash several commits into one.
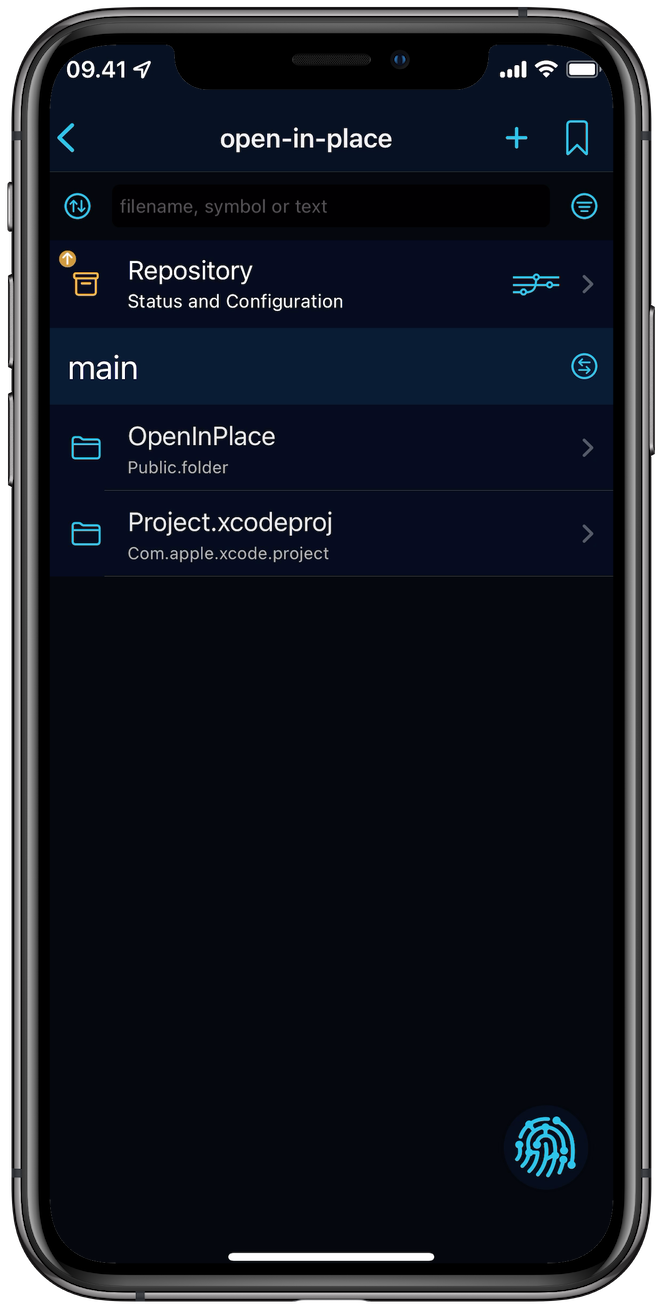
A great advantage of Git compared to other version-control software is the ease at which you can branch your repository to work independently on different things. Once you are confident with the work undertaken in a branch, it can be merged back into one of your main branches.
The current branch (main in the screenshot) is shown in directory listings between the Status cell and the actual file listing. Switch to other branches with the button to the right of the branch name tapping the bottom of the branch picker popup for a list of all branches.
Tapping a branch from the full list brings up a detail view where you can checkout the branch (make it current), rename or delete it.
Swipe left on branches to Checkout, Rename or Delete without having to go to the detail screen. When a local branch is ahead of its remote, you can Push as well.
You create new branches from the current one with the upper-rightmost button. To put commits on a branch you can either Merge or Rebase. Atlassian has a great tutorial describing the differences. In both situations you change your current branch to include commits from some other branch.
Merge will create a merge-commit as needed, while rebase will rewrite commits from your current branch on top of the commits from the other branch. Working Copy will not rebase if this requires rewriting commits that have already been pushed to a server. You can override this behaviour by configuring the branch for History Rewriting, but this in turn requires you to Force Push. This also lets you Undo commits already pushed to a remote.
You Reset the head of the current branch from the commit you want to become HEAD. This is a soft reset that leaves the working directory as before the reset which can be fixed with Revert as needed. If you navigate the commit list through a non-current local branch you are able to Reset the head of this branch. In all cases you will be told what is about to happen as you confirm the Reset.
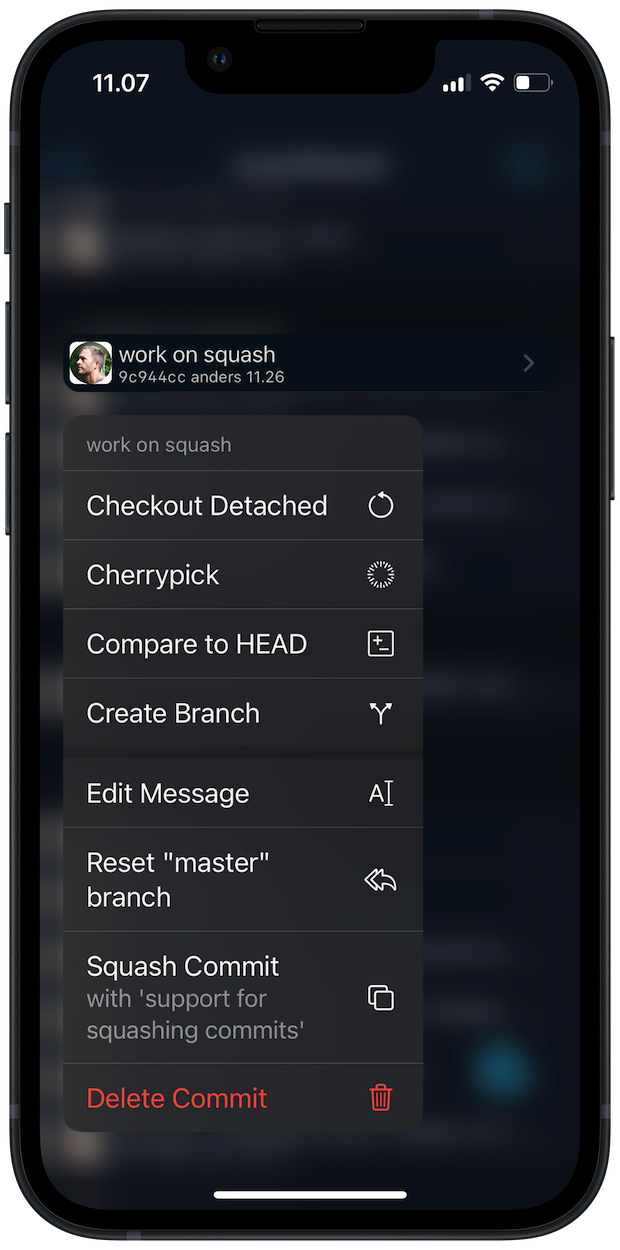
Each commit represents changes made to files and it can be useful to apply these changes differently to improve the commit history. Applying a single commit is called cherry picking and applying the changes from a series of commits is called rebasing.
Command line Git is able to rebase interactively to change the order in which commits are applied, discard commits, edit commit messages and more. You can get equivalent results in Working Copy from the commit list of individual branches.
Long tapping commits you can Delete Commit to rewrite the branch without the work contributed by this single commit, Edit Message to change a commit message while still applying the same changes from the commit or Squash a commit with its child.
Drag one or several consecutive commits to change the order in which changes are applied. When commits are rewritten in different order it might cause conflicts that you will be asked to resolve.
Rewriting history can cause problems for others working on the same branch and when commits are already pushed to the remote you will be asked to enable history rewriting.
Undo history rewriting by shaking your iPhone, using three-finger left swipe or pressing ⌘Z on external keyboards.
Branch Editing is a Pro feature.
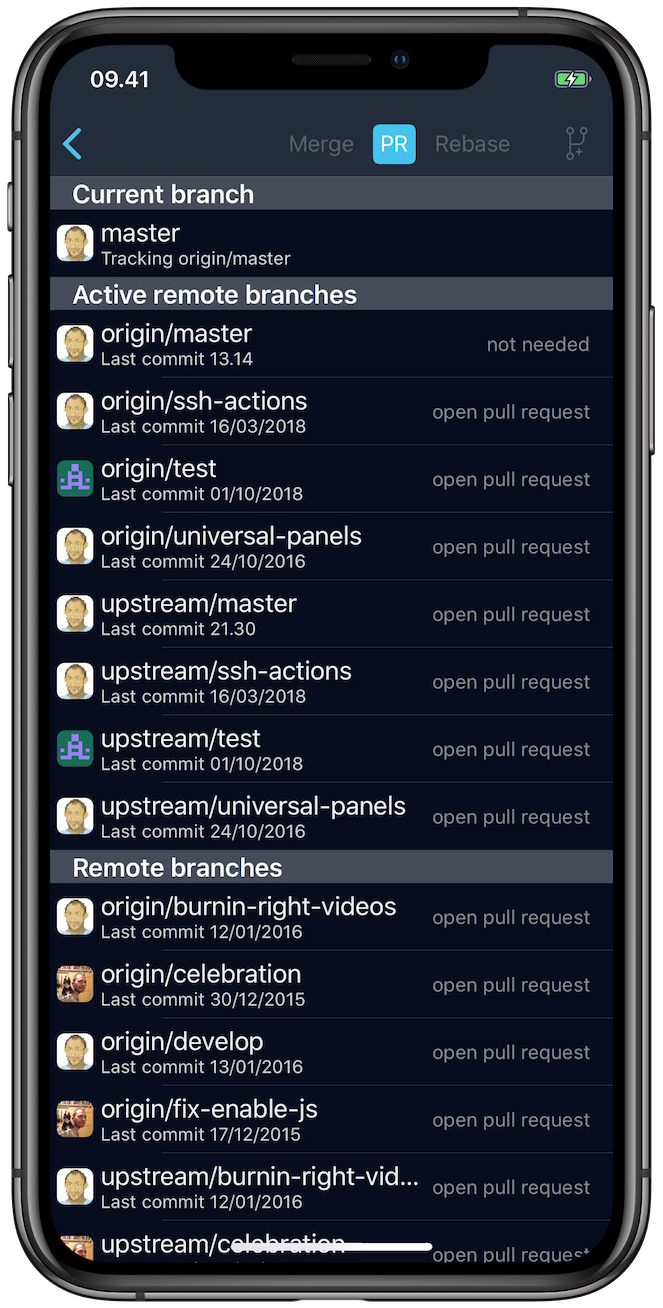
Where Merge and Rebase incorporates changes from other branches into your current branch, a Pull Request or PR works in the opposite direction asking others to incorporate changes from your current branch into some base branch. Working Copy supports creating these for BitBucket, GitHub and GitLab.
You tap PR from the full list of branches and pick the remote branch that should be the base of the Pull Request. It is the base branch that receives new commits from your current branch.
In order to open Pull Requests between different repositories you need to have a remote configured corresponding to the repository with the base branch. When cloning from GitHub and GitLab the app tries to configure a upstream remote when the cloned repository is a fork. Do a single Fetch after enabling the upstream remote to include this repository in your branch list.
Creating a Pull Request is the first step in a workflow that might involve code review, discussions or automated verification and ends up with the pull request being accepted or closed days or weeks later.
Manage the communication aspects of Pull Requests in your browser or with apps such as GitHub for Mobile and handle the code in Working Copy.
Continue work on existing pull requests by invoking the share sheet on a link and picking Process in Working Copy. Working Copy makes sure the repository is cloned, relevant remotes are configured and the branch is checked out.
Long tap the repository to jump back to the Pull Request page on the hosting provider website.
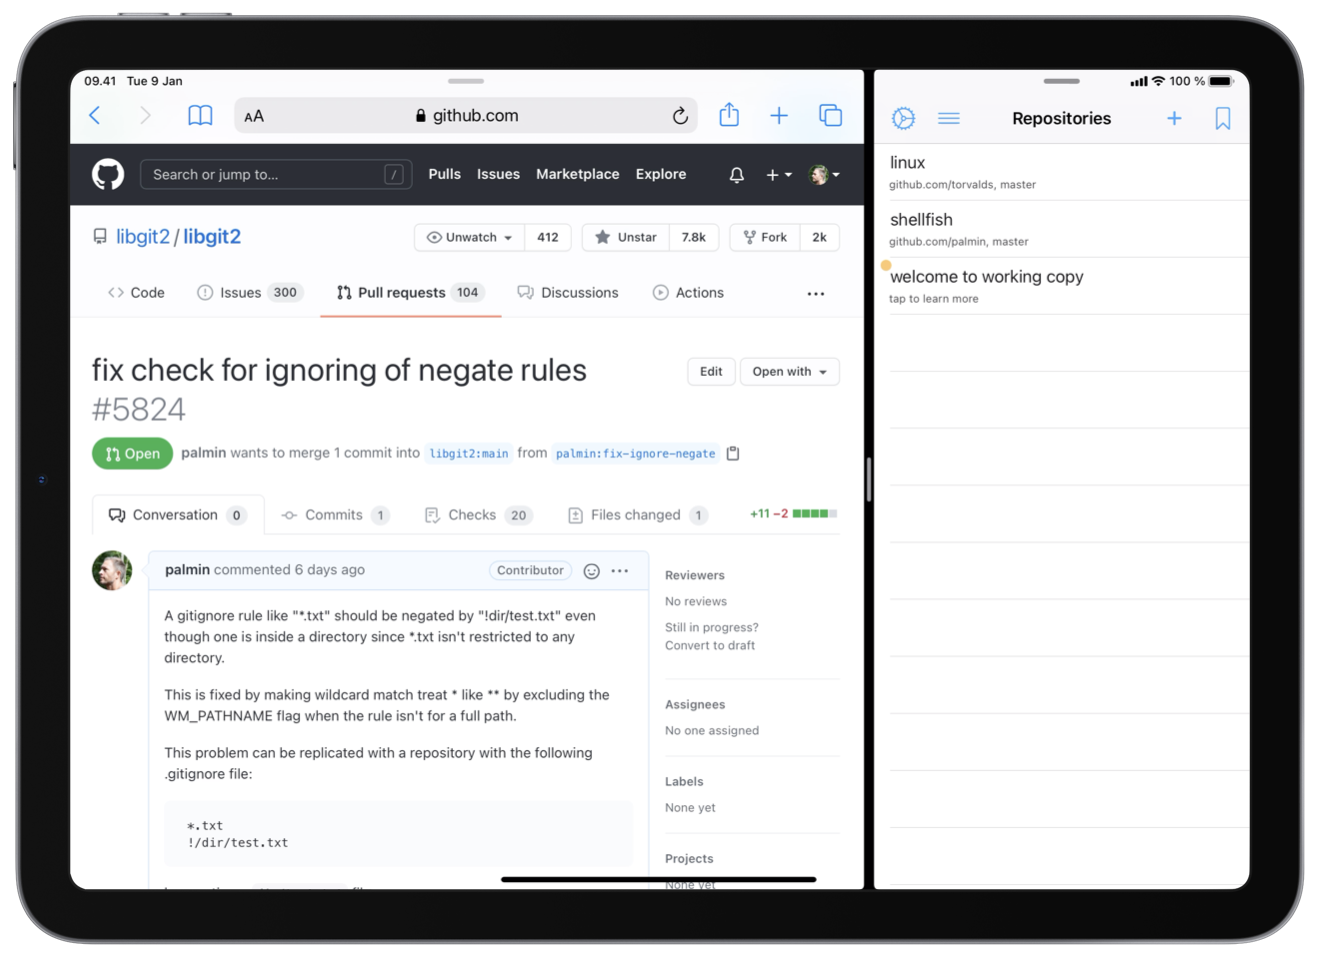
Pull Request creation is a Pro feature.
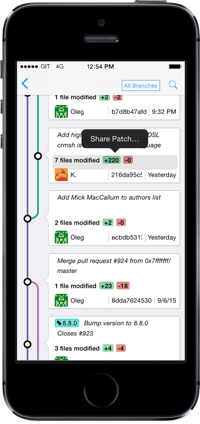
To explore repository changes across branches use the Commit Graph available from the Repository screen.
Commits are presented in chronological order with lines showing which commits are based on each other, with tags and branch heads displayed as well as the commit message summary, date and information about the author of the commit.
Pinch to zoom will let you explore additional details, such as the full commit message, the full name of the author rather than initials, a commit identifier and the files modified by this commit. If you connect an external screen or projector to your device, you will get a full-screen Commit Graph without any interface elements obscuring the view. This makes for a convenient tool when your team needs to discuss the project.
Tap and hold or double-tap elements of a commit for additional actions, where the commit message itself takes you to a detail view.
You can copy the author email to the clipboard or start composing a email to the author.
It is also possible to view the commit date in your calendar to see what else happened around this time and when Fantastical is installed, it will be used instead of the built-in Calendar app.
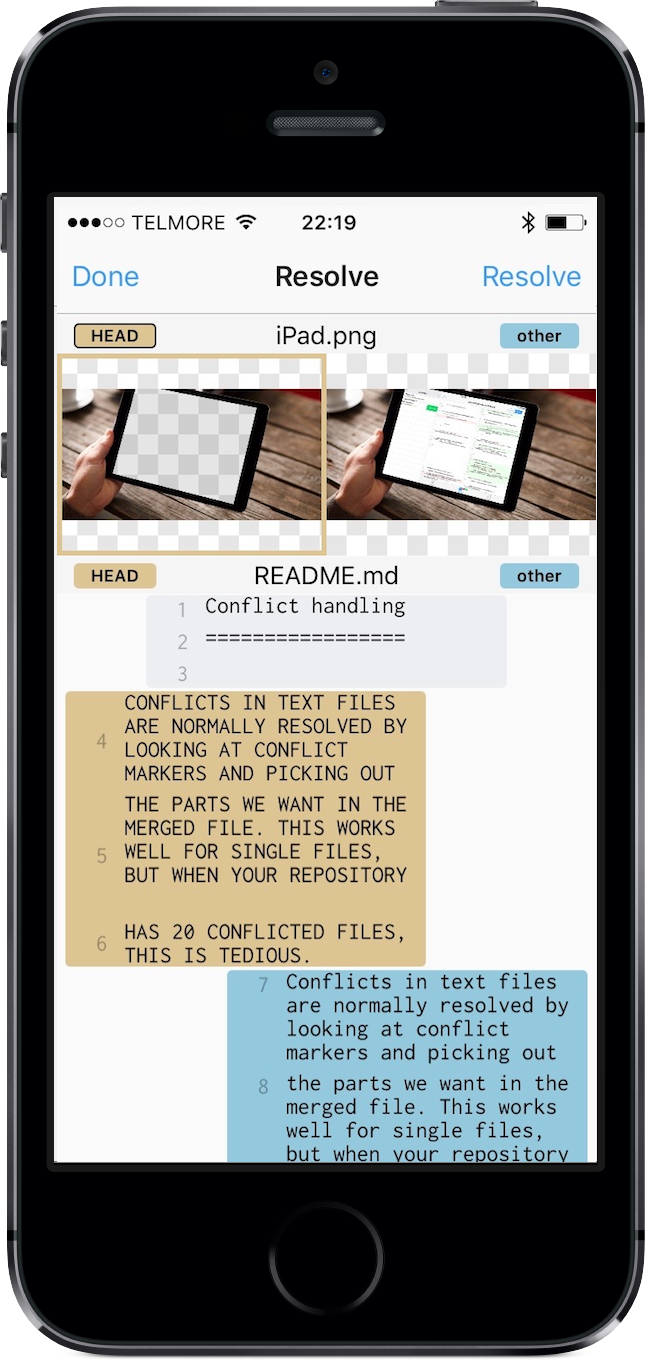
Working Copy has a built-in Resolve tool that can be used to fix conflicts for the entire repository, a subdirectory or single files, depending on where in the directory hierarchy the tool is invoked. Swipe left on cells for repository, directories or files to get started.
Text files are shown as chunks of text, where everything both files agree on start out in the center, and everything from our version is to the left and their version to the right. You swipe these chunks towards the center to include them and away to exclude them. This way your final file will be lined up at the center. Chunks at the border are pending your decision.
If you want to use all chunks from one version of a file and discard the other version of the file entirely, you can tap one of the branch names at the header of the file. These are HEAD and other in the screenshot.
There is no way to combine conflicted images and other binary files. You need to pick one or the other by tapping the one you want. The selected version is marked by a thick border.
When all chunks have been either accepted or rejected and no binary files are awaiting your choice, tap Resolve to verify your choice and mark files as resolved. Next commit will conclude the merge. If there are chunks or files pending your decision, the Resolve button will scroll to indicate this.
You can also resolve conflicts by manually editing files. The Content tab for a conflicted file has a Resolve button for marking the file as resolved, when you have picked the content you want and removed conflict markers.
Git supports signing commits to make it possible for others to verify that commits have been made by you. When signing you need a GPG or SSH private key that must be kept secret and when verifying commits the corresponding public key is needed.
You attach a private key to your Identity which can be imported or generated inside the app. If the key is generated inside Working Copy you can attach it to your GitHub account with a single tap or you can export the public or private parts of the key to do manual configuration.
SSH commit signing is a pro feature available to users that purchased or upgraded their pro unlock on January 19, 2022 or later. PGP signing is a free feature.
Your private key needs a passphrase. You can configure Working Copy to Ask every time the passphrase is needed, to store the passphrase in the keychain requiring you to authenticate with Touch ID before it is read or to just Remember the passphrase in the keychain.
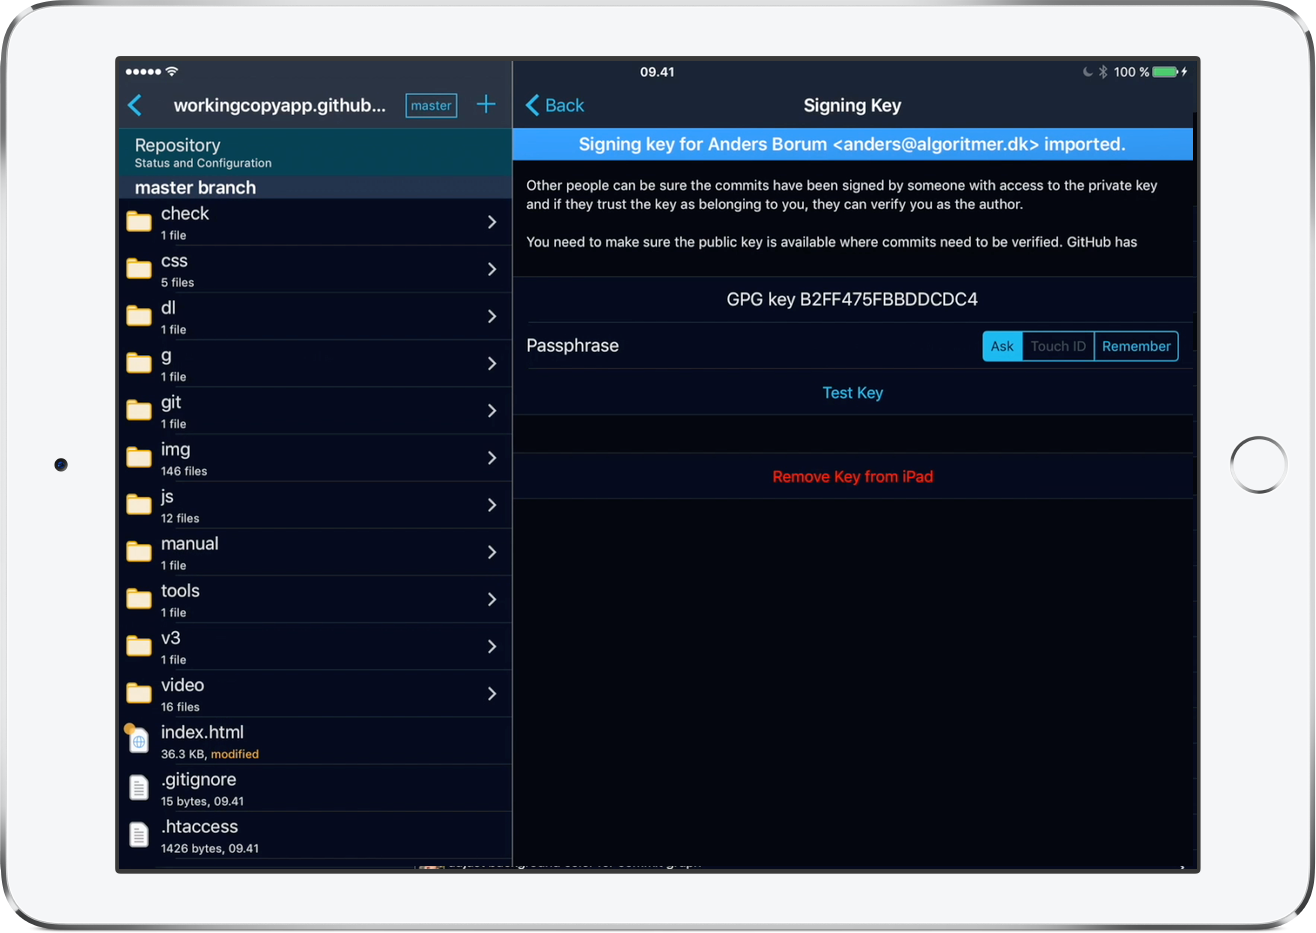
Signing commits makes it possible to verify that the commit is made by someone with access to the private key. This information is only useful when other people can trust the private key is yours and they need a PGP or SSH public key for this. GitHub makes this easy by letting you associate a public key with your user account, but commit verification is possible in other environments by importing public keys into the GPG keyring.
Git has the ability to create a tag in a repository to reference a specific point in history. This is typically used to mark a release or other milestone on a project.
View the list of tags from the Repository status screen creating new tags by tapping + in the upper right corner. Create non-HEAD tags by navigating to a specific commit and tapping Tag along the top.
To create a lightweight tag you enter a name and leave the message empty. Enter a message for a full annotated tag that includes author information, date and the message entered. Creating annotated tags is generally considered best practice.
Created tags are transmitted to the remote on next Push.
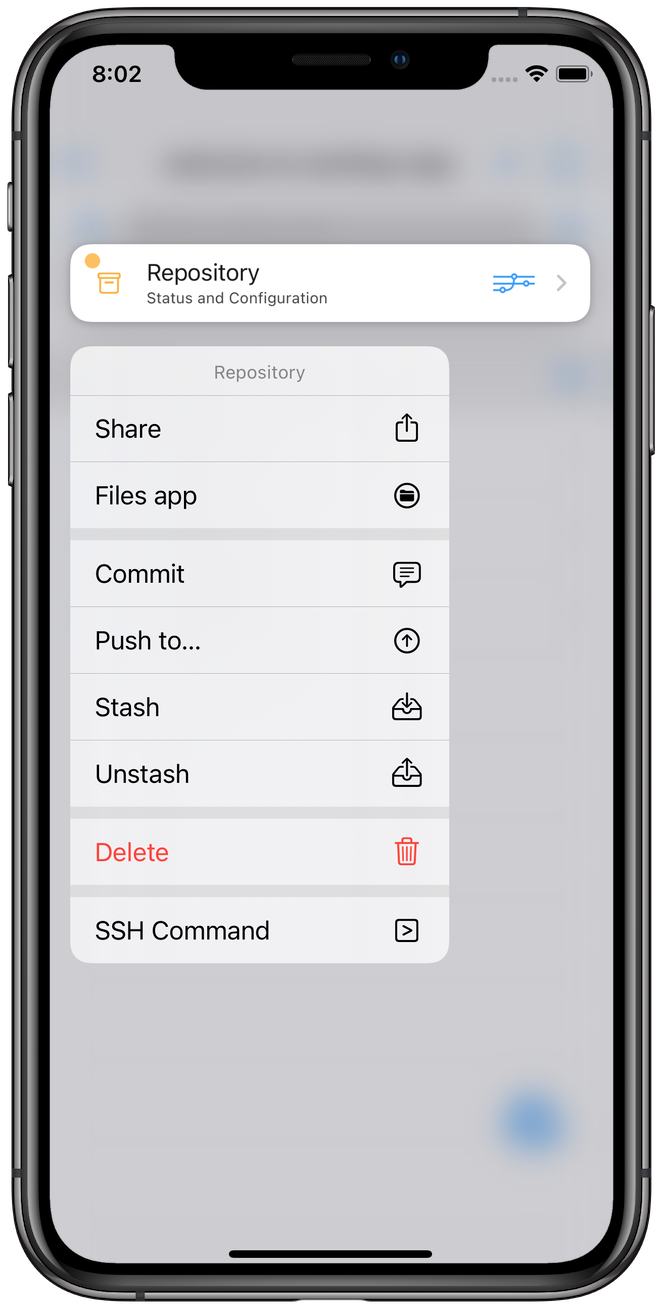
Sometimes your repository has modified files that aren't ready for commit but prevent you from doing other work. Stashing makes your repository clean until you bring the changes back by unstashing.
You Stash and Unstash from the context menu of repositories.
Stashing is a pro feature available to users that purchased the unlock or upgraded their pro unlock on December 9, 2019 or later.
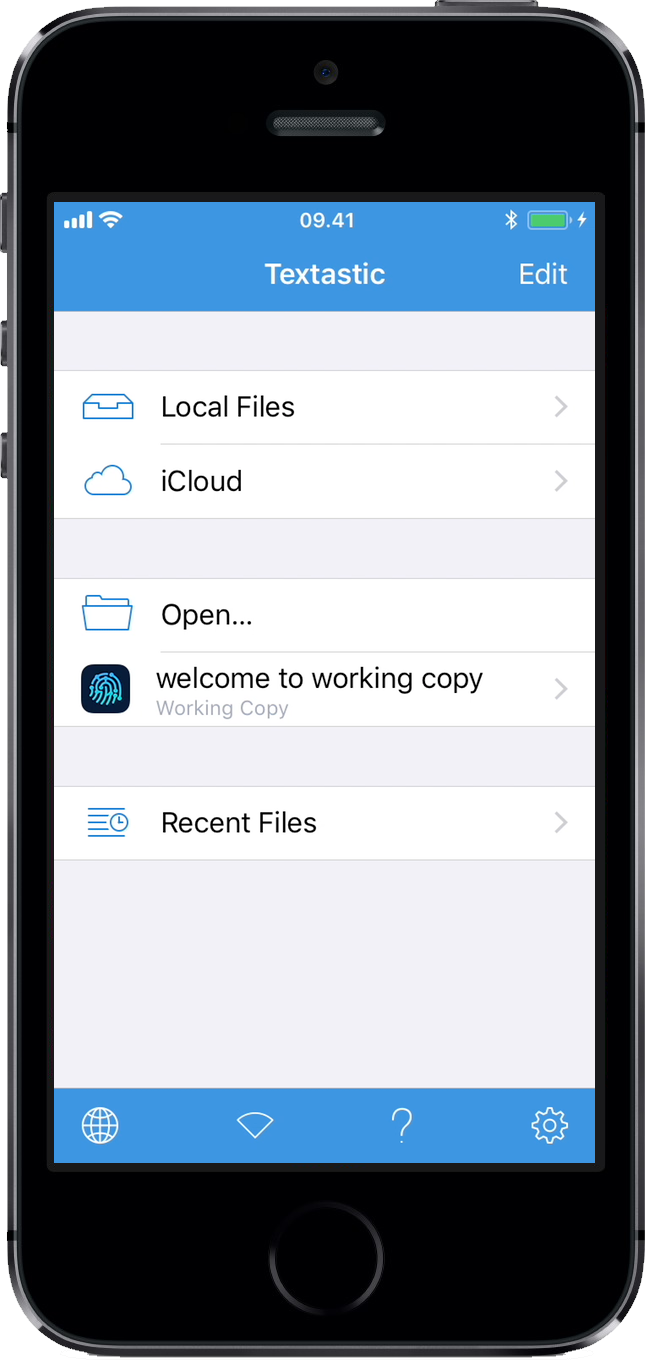
All repositories in Working Copy can be accessed in the Files app and 3rd party applications using the document picker or file browser components. Other application are allowed to read and make changes to files and these changes stay inside Working Copy. Perform editing in other applications and switch to Working Copy to review and commit changes.
Initially you need to enable Working Copy as a Location in the Files app and on iPad you can use Split View to avoid switching between Working Copy and the editing application.
Textastic is a very good general purpose/programmers editor that works well with Working Copy. Use Open… to open files and Add External Folder… to open entire directories in-place. You can read more about this in the Textastic documentation.
iA Writer is a markdown editor with great design and typography that can edit Working Copy files and directories in-place. Files are added at the From Other Apps screen. Add entire directories by tapping Edit and then Add Location… from the Library screen.
Ulysses is a focused and feature rich writing app where the library of files can be kept inside Working Copy for easy version control of your writing.
1Writer
is another good Markdown editor and you open files in Working Copy by tapping  in the lower right corner. If you need to work with images
Pixelmator
is a good choice.
Drag and Drop makes it much easier to get files into or out of your repositories.
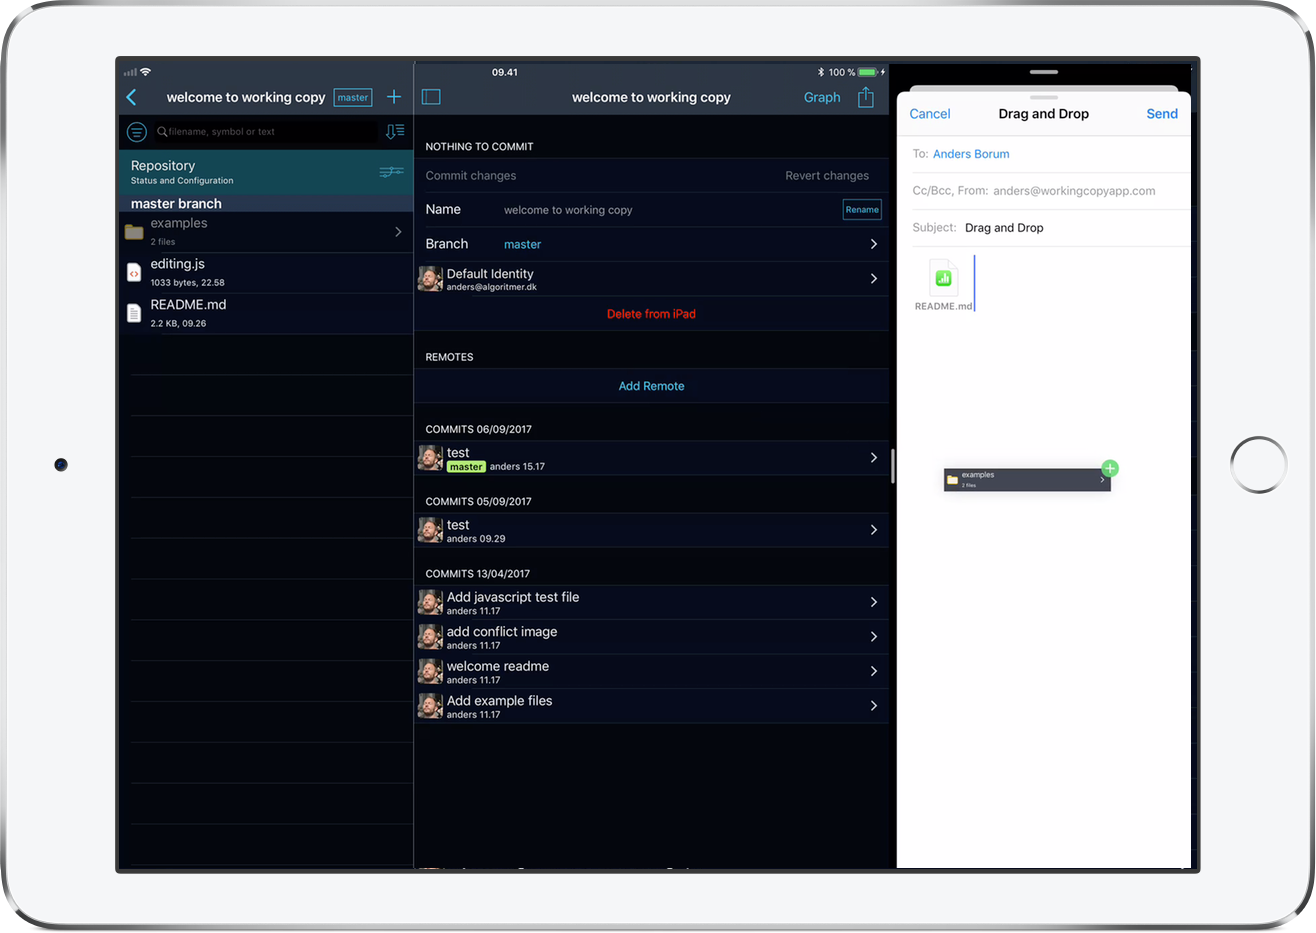
Drag files from your emails, the Files app or any other supporting app to add to your repositories. When files already exist you can import as a new file or overwrite the existing one and when the existing file in your repository is already committed overwriting is automatic, saving you a little time, as it is very easy to Revert to get back old files.
Directories can be dragged into repositories or to the repository list to import a new repository and zip archives can be decompressed as they are dragged.
When dragging files out of Working Copy the result will depend on the target app. Dragging files into emails will attach them and dragging into the Files app will export to this location. Editing apps such as Textastic that support this can receive a reference to files or directories letting them edit in-place such that changes are made inside the repository.
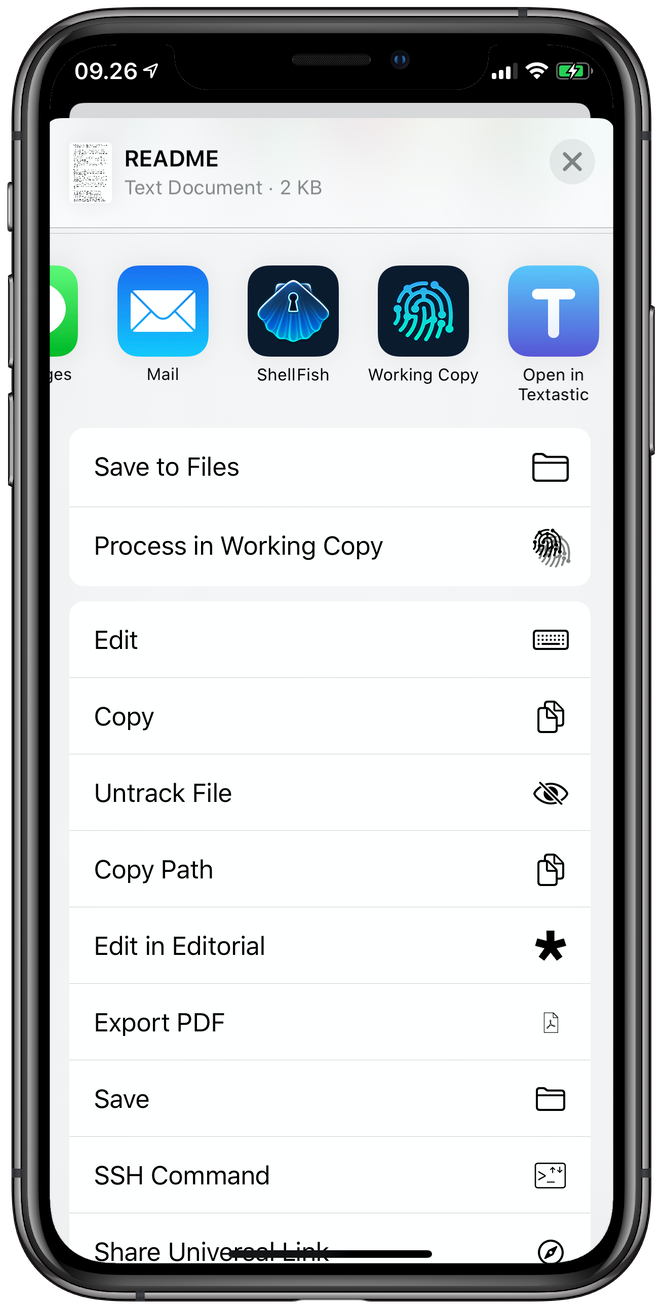
Saving files into Working Copy can be accomplished by way of a Share sheet, the mechanism also used to share files with Mail or Messages. Picking Working Copy on a Share sheet will present a list of repositories, where you drill down to the directory where the file should be saved. To overwrite existing files you tap a file before confirming. Otherwise you will be prompted to enter a new file name.
After saving a file you can optionally Commit this change immediately and Push to the remote right away.
When saving zip-archives into Working Copy you can either import the archive as a new repository, extract to a existing repository overwriting existing files as needed, or you can save the zip-file as is.
In some situations you browse files in Working Copy and need to pick out a file you want to edit in another application. The action-button in the upper-right corner used to present a share-sheet also lets you send files to other applications.
Open In … or Copy to … is the most basic choice and lets you pick any app supporting that type of file. Editing will often be on a copy of the file and it must be transferred back to Working Copy with Save in Working Copy, but if the app you pick says Open in as opposed to Copy to the application is able to edit the file in-place with no need to write back changes.
You will only see actions for apps you have already installed and you can change the order by picking More to the far right.
Some apps do not support opening files or directories in-place. If they use iCloud Drive or On My Device to store documents, you can link from the other app into Working Copy to manage documents using Git.
When adding repositories you tap Link external directory and pick a folder in the Files app. This will appear as any other repository inside Working Copy and as you edit, commit, push and pull the changes are made to the original linked directory.
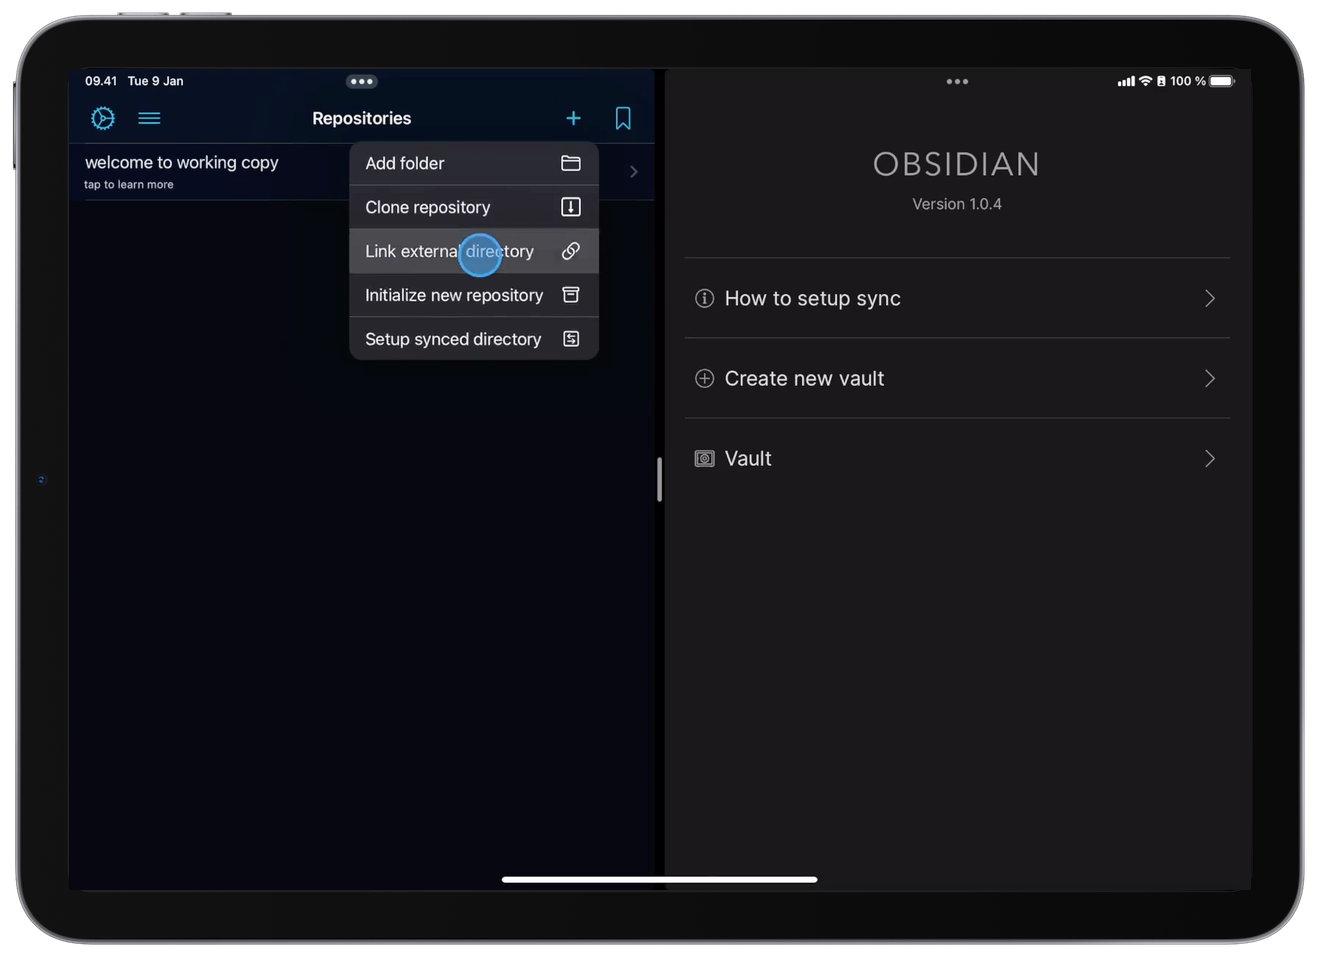
Alternatively you can drag directories from the Files app into the repository list in Working Copy to create links. This is the only way to link to document packages likes Swift Playgrounds and Codea projects that are not treated as folders by iOS.
Working Copy needs folder-level access which can only work with Files app locations that support picking folders such as iCloud Drive, On My Device or Secure ShellFish. Unfortunately the major cloud storage solutions only support granting file-level access.
A .git folder is created if the directory you pick isn't a repository and kept inside Working Copy to not confuse other apps. You can change the location of the .git directory from the repository configuration screen.
You can convert regular repositories inside Working Copy into external repos. Enter the Status and Configuration screen and pick Link Repository to Folder or Link Repository to Document from the title menu where the latter works for directory-like documents such as Swift Playgrounds and Codea projects.
Linked external repositories is a pro feature available to users that purchased or upgraded their pro unlock after September 2020.
This can be used with apps such as Codea, iA Writer, Obsidian, Scriptable, Swift Playgrounds and other apps that store documents in iCloud Drive or On my Device but depending on the app in question they can be confused if the document files are changed while they are running.
Megan Sullivan wrote an excellent blog post on how to sync Obsidian Vaults using Working Copy and the Shortcuts app. Since this blog post was written the location of Link Repository to Folder has changed and is now found in the title menu.
Configure Working Copy to open directories used by these other apps in-place. As you work in the other apps, your changes are synced back to Working Copy to be committed. When you pull down commits from a remote any changed files are written back to the directory in iCloud Drive or "On my Device" for the other apps to use.
You configure a brand new repository for syncing by tapping + from the repository list, Setup synced directory and pick a directory. All files from this directory will be imported into a new repository ready to be committed. You can add a remote from the Repository status screen.
For existing repositories use the Setup Folder Sync action from the title menu of the repository or sub-directory status screen. Initial synchronisation will combine all files from both sides but later on the modification dates are used to determine what needs to be copied and what needs to be deleted. It is only possible to have a single directory synced with each repository in Working Copy.
When picking a directory for sync, iOS doesn't allow picking document packages, which are documents that are directories rather than files. Use Setup Package Sync to bypass this limitation.
Sync status is shown with a icon above directory listings that you tap for a list of recent sync operations. You can restore files overwritten or deleted by tapping Restore from this list. Backup files are kept for at least seven days.
You can deactivate syncing from the list of sync operations.
In some situations both sides of a file have been modified since the last sync and Working Copy will pick the side most recently changed. To draw your attention to this possible data-loss these sync entries have a warning icon and the sync icon shows a orange counter with the number of warnings since you last viewed the history. A red counter indicates the number of errors since you last displayed the sync history.
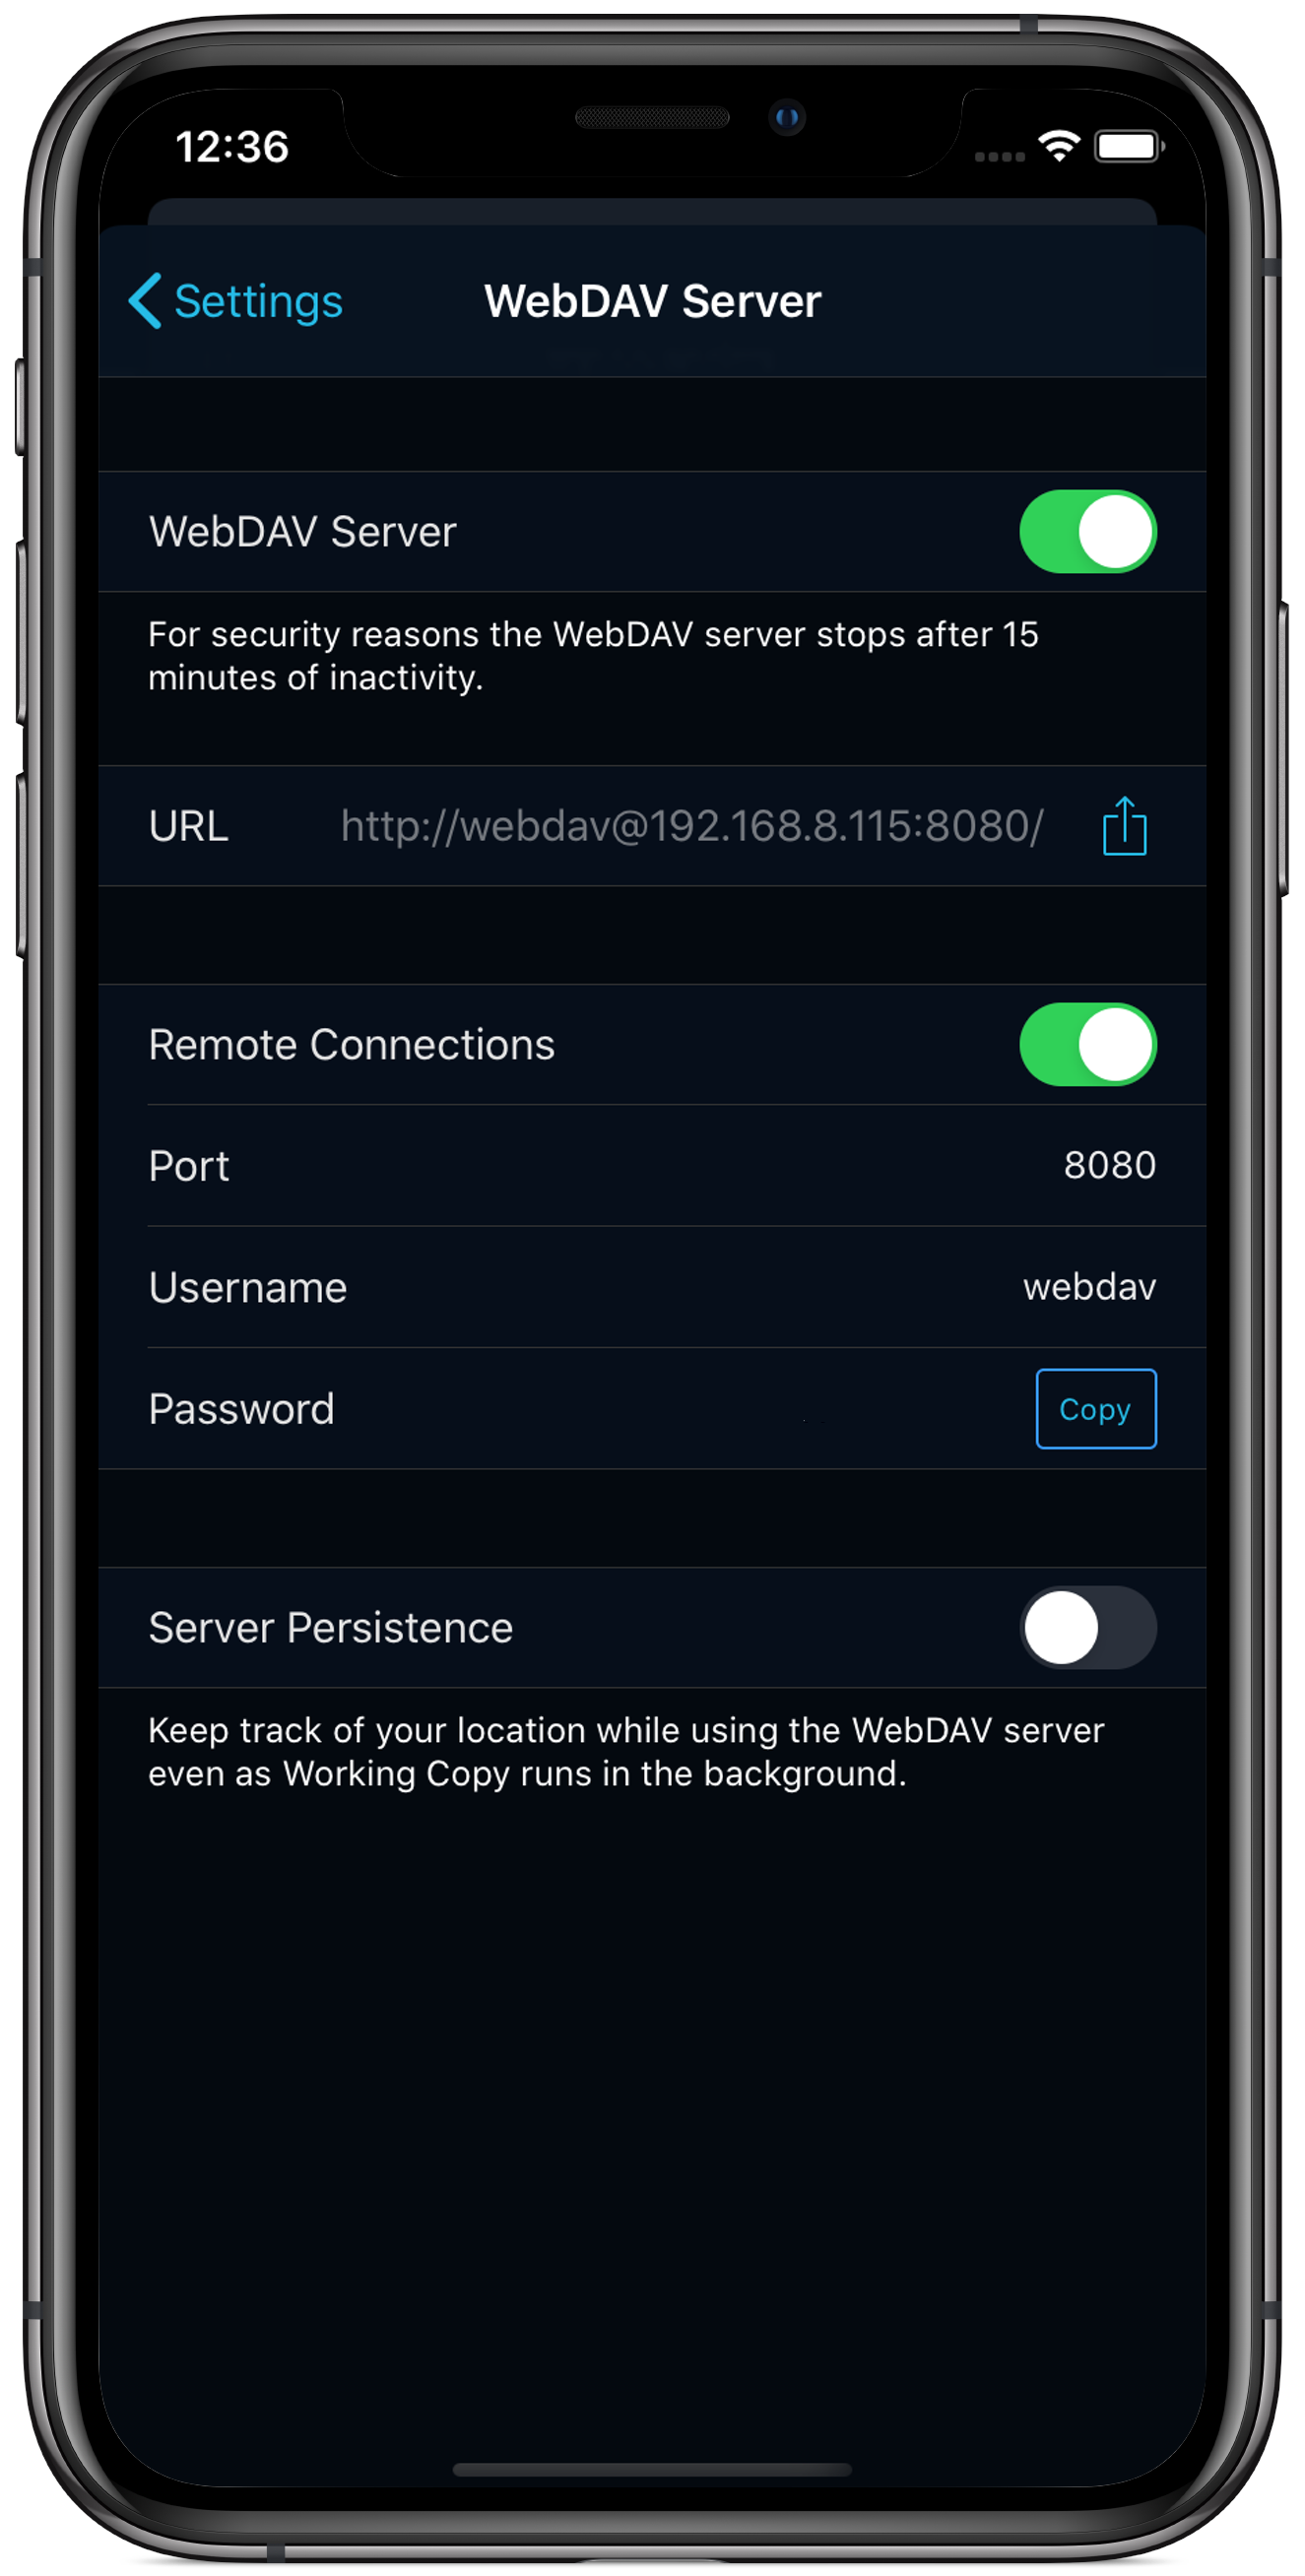
In situations where you need to transfer entire directory hierarchies, a good way to get files into and out of Working Copy is the built-in WebDAV server.
WebDav cababilities are built into the macOS Finder and most versions of Windows also let you access WebDAV by mapping to a network drive. You will also be able to use third party WebDAV clients for macOS, Windows, Linux, Android & iOS.
As a security precaution you need to start the server before each use and it automatically shuts down after 15 minutes of inactivity. You should be cautious of using the WebDAV server on untrusted networks as the transfers are unencrypted. In these cases you should restrict yourself to connections from applications on the same device, as the traffic cannot be intercepted when it never leaves your device. Local connections are also possible in situations without an Internet connection. You need to specify localhost as the hostname in these situations.
Applications on iOS are restricted as to how long they are allowed to run in the background. If you start the WebDAV server and switch to some other application, you will be given a grace period before Working Copy and its WebDAV server is terminated. A notification will inform you of this and you can Restart right from the notification to extend this grace period.
Enable Server Persistence to keep track of your location while WebDAV is enabled and keep Working Copy running in the background.
Working Copy supports automation through the Shortcuts app where files and other data can flow between actions. You locate these actions inside Apps > Working Copy.

Use Get Repository Files to get one or several files from a repository that can be passed to other actions. The Path parameters can contain wildcards such as docs/*.md and if it points to a directory all files inside are returned. You can configure the action to only include files with a particular status such as modified and combining this with Path=/ can be useful to get all files with this status.
Files returned from Get Repository Files can be changed in-place by the shortcut but only some actions work like that and often you need Write Repository File to put content back into repositories. This writes a single file at a time but you can use the built-in Repeat with Each action to write several files. Path controls the destination and can be a directory to write inside this directory, but the action refuses to overwrite existing files unless you enable this as one of the options shown when you tap Show More.
Once you have changes use Commit Repository to commit with some Message. No commit dialog is shown and the action looks at what has been staged for commit either through the Write Repository File that stages written files by default, through the Stage for Commit action or from using the Commit dialog elsewhere and cancelling that dialog. You can configure the commit to include all modified files and not just the staged ones.
Pull Repository fetches and merges any new commits from the remote and Push Repository pushes back commits. It can often be useful to include these actions as the first and last in a shortcut to make sure work doesn't just stay on your device. Both actions can be configured to use a specific Remote if you have several.
Switch between branches with Checkout Branch as long as there are no modified files and implement custom Git flows with Create Branch, Merge Branch & Delete Branch.
List the most recent commits using Repository History from any branch, current branch or a specific branch of your choice. Each commit contains the message, author, date, sha1 identifier and link to GitHub.com and other hosting provider websites when Working Copy can determine this.
All previous actions work from the Shortcuts app without having to launch Working Copy, but it can be useful to be able to launch the app to show specific information. The Open in Working Copy action can be used to show files, directories or the repository itself and to clone repositories as needed.
Working Copy uses filesystem encryption to make sure repositories are only available when the device is unlocked. This is reassuring if your device should ever be lost or stolen but inconvenient when using Shortcuts automation. Consider configuring automations in response to app lanches as the device will be unlocked and your repositories available.
DraftCode is comprehensive editor and runtime for PHP, that lets you run entire websites on your iPad or iPhone. Everything happens on your device and works when offline.
You can transfer a directory to DraftCode by picking Copy from the share sheet of a repository or directory and then using the Files app navigate to Locations > On My Device > DraftCode > filestore where you tap-and-hold and pick Paste.
Not every tool is available on iOS, and Working Copy lets you use remote computers to work on the files in your repositories. Git remotes can be configured to perform operations at Push or you can use secure-shell to upload files to remote server and invoke commands.
Working Copy will record log files as you clone, fetch from and push to repositories. This can be helpful when troubleshooting connection problems and if you are pushing to special remotes like Heroku the log can contain information such as whether deployment was successful.
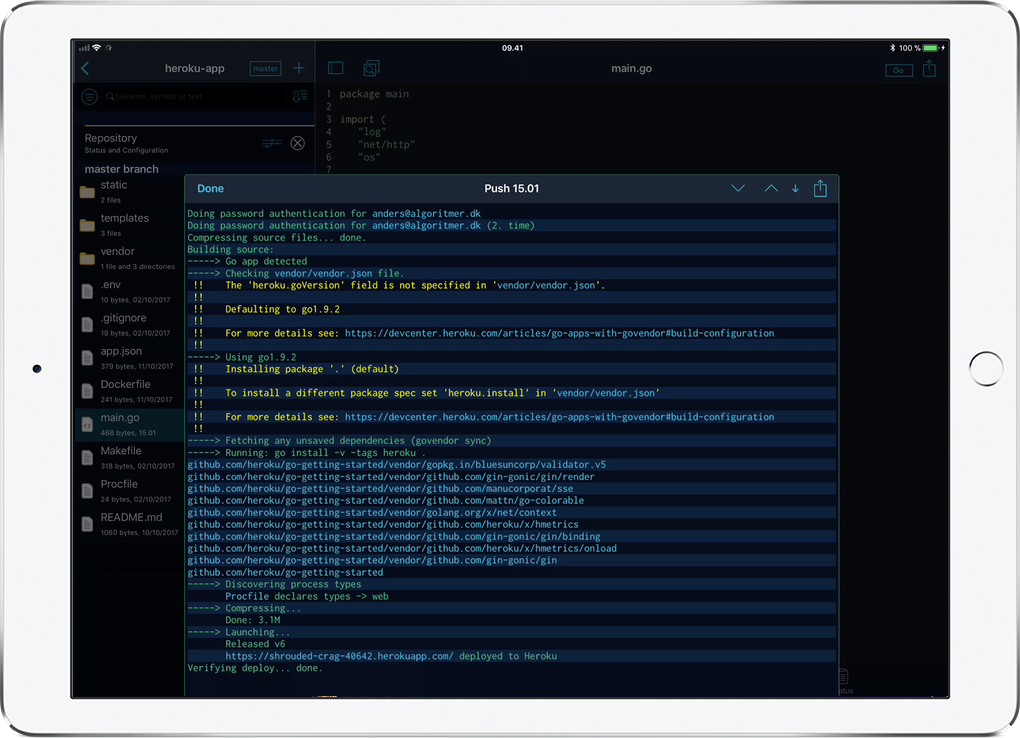
When something interesting is logged during a remote transfer, a log thumbnail will appear in the lower right corner. You can drag this out of the screen to fully hide it or tap to open up the log.
Access the list of previous logs using a button at the top of the repository list. To keep this list tidy, only recent log files will be kept, but you can mark a log file as favourite by tapping the star to avoid automatic cleanup.
Log files can be linked to a repository inside Working Copy, such that filenames are turned into references. Regular URL's and email addresses are detected as well and tapping these will show a preview and let you act on them and while preview is shown, you will be able to Handoff the link to nearby Macs or iOS devices for browsing.
Often the log files exist outside Working Copy in emails, on build-server status pages or as raw text in actual log files. To import logs into the app, use the Process in Working Copy action extension from the share sheet. It knows how to deal with build status pages from App Center, BitRise, Circle CI and Jenkins but it can be used on raw text as well. Zip archives will be unzipped and imported as a single log-file with special markers to indicate filenames.
The best way to capture logs from App Center builds is to tap Download Logs and use Process in Working Copy on the zip archive.
Your log files are entirely private and unless you explicitly export them they stay on your device.
It can be convenient to upload the files in your repository to a test server, and to keep server files in sync as you make changes on iOS. To do this you enable the SSH Upload feature from the share sheet for a repository or directory.
As implied by the name, files are transferred using secure shell, where you either authenticate using password or SSH keys. You pick a server, a Remote directory and a Local directory where the entire repository is used if you do not specify a Local directory. You access a list of previously used servers with a button to the right of the Server field which also contains computers advertising SSH services.
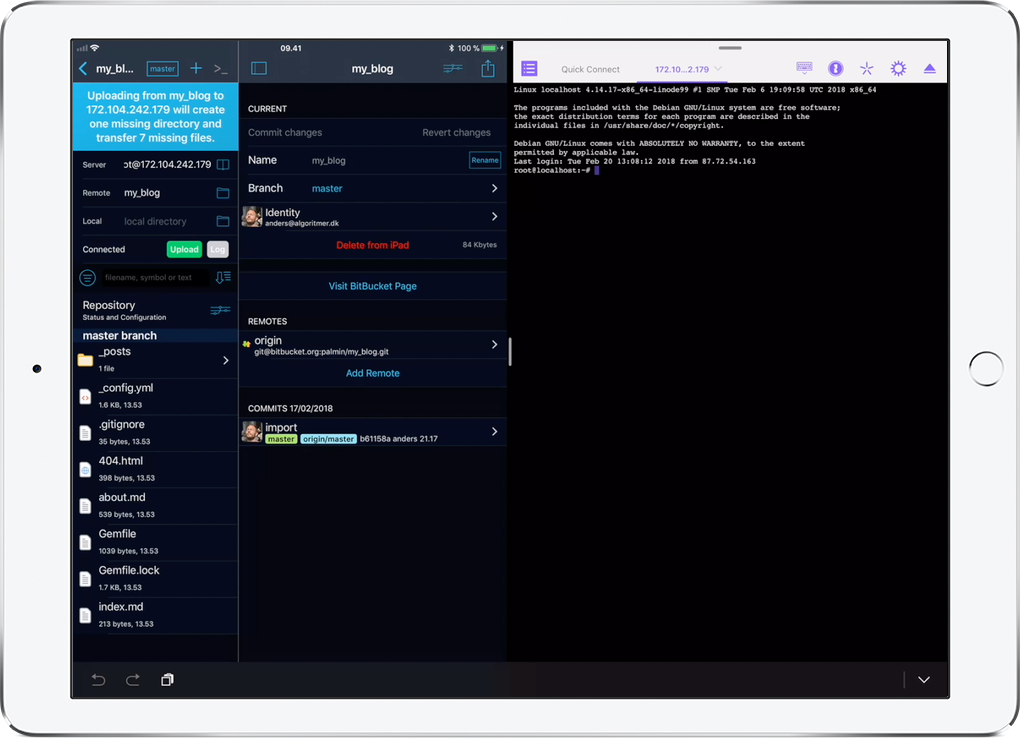
Tap Upload to start, where the app will compare files and directories in the Remote directory to those in the Local directory uploading any files missing on the remote server or where the local file is different than the remote file.
Once initial upload has completed, the local directory is watched for changes and these are transferred automatically until Upload is stopped. This is especially useful when working on Jekyll sites, Node.js services and other technologies that can reload when files change.
You can switch to other apps for editing files, but Working Copy is only allowed to keep running in the background for a limited time. A notification will inform you when Upload is stopped for this reason.
Once SSH Upload is configured for a repository, a new button is available in the upper right corner of the directory listing. This makes it easy to access configuration and the icon will show status, turning green when Upload is enabled and indicating when files are actively being transferred and if there are errors. If you clear all fields in the configuration, you can tap Hide to disable SSH Upload entirely until you enable it again with the share sheet.
Sometimes you need to apply a tool on your server to the files in your repository on iOS. You can run make on a Makefile, have pdflatex create a PDF file from LaTeX, use xcodebuild to build apps or almost anything else you can invoke on the command line.
SSH Command lets you configure commands for different file types that can be invoked on your server using secure shell. Output from the command is shown as a log file, where mentions of files that exist in your repository are converted into links. Files on the server created or modified by running the command are downloaded back into your repository.
You do this from the context menu of files and directories or with ⌘ $ or ⌘ ⇧ S as keyboard shortcuts. Configuration is similar to SSH Upload but you also configure a Command to run on the server. When you tap Start a initial upload is performed, but while waiting for local changes the specified command is run on the remote server. When this command has completed upload syncing stops and any files created or modified will be downloaded into your Local directory.
Machine generated files are often not version controlled, and the easiest way to enforce this, is to add these to your .gitignore file. Sliding left on files in the directory listing and picking Ignore is the fastest way to achieve this. Note that files in .gitignore are still downloaded and uploaded. It is only for version-control purposes they are ignored.
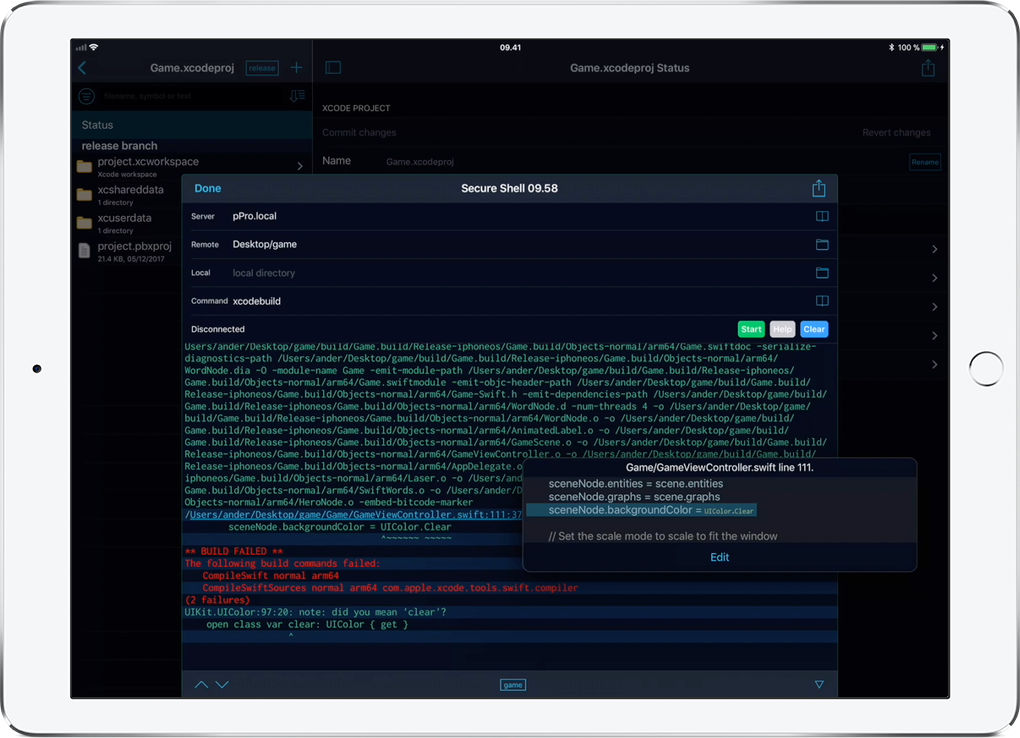
Since Working Copy has no way of knowing which files are relevant, everything in your Local directory is synced to the Remote directory. If you run the same command many times using the same remote directory, there will often only be a few files that have changed and need to be uploaded. When configuring the command it can be helpful to create a subdirectory just for running this command, which can be done by tapping + in the remote directory picker.
The app will remember previous commands and these are available from the button to the right of the Command field combining commands for the exact filename, the same file extension or the most recent commands for any file. The top choice for a given file is available as a action when sliding left on files in directory listings.
You need a Linux or BSD server accessible through secure shell to use this feature, but it doesn't have to be a expensive server. A small virtual private server (vps) will get you far and can be purchased for less than $5 per month. You can use your Mac as a server by enabling Remote Login.
Even though you can run all sorts of commands, this feature is not a substitute for a standalone SSH client. When your operation has multiple steps or you are not 100% sure what option a command takes, a standalone interactive SSH client should be used. A good compromise for complicated commands is to use a interactive client to create shell scripts that you invoke with SSH Command. Secure ShellFish is full featured SSH client by the developer of Working Copy, the editor Textastic contains an interactive SSH client and La Terminal is another powerful SSH client from the creator of Midnight Commander.
To exclude the files uploaded and downloaded put a .sshignore file in the outermost directory of your repository. The format is similar to .gitignore in that each line is a glob pattern of files to exclude, where * matches a number of filename characters and ** matches a number of characters including /. Matches are done against the entire path when / is part of the pattern and otherwise only the filename should match. Details of the pattern format is the same as for .editorconfig.
Lines starting with # are comments and you start lines with ^ to make reverse rules overriding earlier but not later lines.
# Ignore .bin files everywhere, but only .js files inside tmp & don't ignore Index.js
*.bin
/tmp/*.js
^Index.js
If the server claims your regular commands do not exist the $PATH variable is probably not what you expect. Try running echo $PATH using SSH Command as a troubleshooting step. Working Copy identifies itself as a interactive login shell, but in reality it isn't interactive and if the server detects this your .bashrc script might not run. Doing path configurations in .profile or .bash_profile can fix this.
A lot of work has gone into making Working Copy as trouble-free to use as possible, but despite that, problems will sometimes occur. Please send your questions by email to and I will do my very best to assist.
Files stored in Git are often very safe, since repositories are stored in multiple locations some on local computers and some on remote servers. Files that have not yet been committed and pushed to a server are somewhat vulnerable to data loss.
These files takes part in regular iOS backup to either iCloud or a local computer through iTunes. You access the files using iTunes File Sharing and since this uses a external computer, you can recover your files in situations where Working Copy itself has problems running. Your files will be in a directory called changes.
When you restore a iPad or iPhone from backup you can reclone some or all your old repositories by going to "Previous repositories" in settings. When cloning completes any changed and not yet pushed files are moved into the repository for you to either commit or discard. Previous repositories without a remote cannot be cloned but are listed to let you export the backed up files.
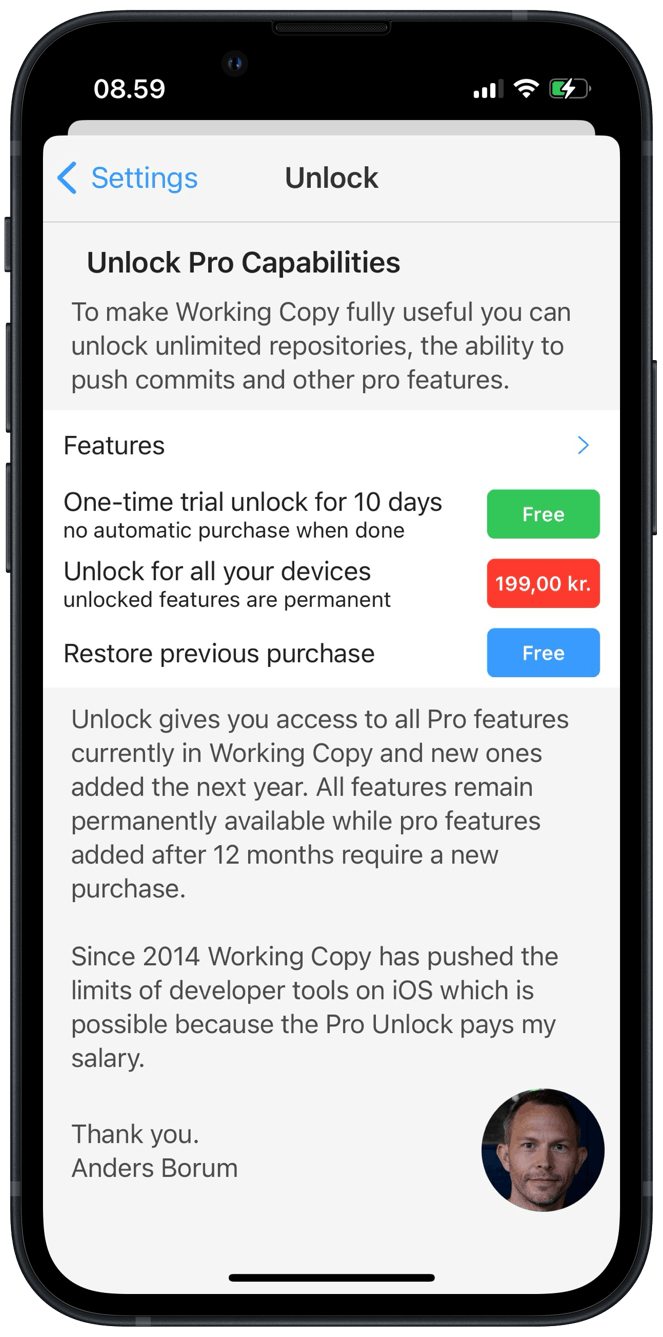
Working Copy is a free download but you need to pay to unlock pro features:
The features you unlock are permanently available and any other pro features added the next 12 months after purchase are also permanently available. After one year new pro features introduced will be locked until you purchase a upgrade. Even if you do not purchase a new unlock after 12 months, the app will still be updated with improvements and bug-fixes.
Students have access to all features for free through the GitHub Education Pack.